Introduction to White Chocolate Pretzels
Oh, girlfriends, I know exactly what it’s like to crave a beautiful, homemade treat.
But who has hours to spend fussing in the kitchen?
We are juggling work, carpools, and maybe even a little bit of self-care.
That is why I absolutely adore making **White Chocolate Pretzels**.
This recipe is my secret weapon against the “I need dessert now” emergency.
Honestly, they are so easy they practically make themselves.
Plus, these delightful little snacks look incredibly impressive on any platter.
They are perfect for impromptu guests or just a quiet evening on the couch.
This recipe is truly a quick solution for a busy day.
You will love how simple and satisfying this process is.
The Perfect Sweet and Salty Balance
There is magic in the sweet and salty combination, isn’t there?
It hits every single pleasure center in your brain all at once.
The crispy, savory crunch of the pretzel is just divine.
Then comes that silky, creamy coating of melted white chocolate.
It is like a mini flavor explosion with every bite.
I find this balance completely irresistible.
This treat never fails to make people smile, and that makes my day.
Why Busy Women Love this Easy Treat
Let’s be real, time is our most precious commodity.
As a busy woman myself, I need recipes that deliver big flavor without the big commitment.
The beauty of making **White Chocolate Pretzels** is the speed.
You can go from zero to fully decorated in under 20 minutes of active work.
The setting time is mostly hands-off, which is fantastic.
This recipe is a lifesaver when you need a quick gift.
It is also great for satisfying those afternoon sugar cravings.
Every busy mom and professional deserves treats that are this effortless.
Why You’ll Love These White Chocolate Pretzels
I know you are looking for kitchen victories, not complicated disasters.
This recipe for **White Chocolate Pretzels** delivers that win perfectly.
It skips the complicated steps and focuses purely on delicious joy.
You deserve a treat that is both quick to make and absolutely delightful to eat.
Trust me, this is the easiest way to impress your family and friends.
It truly makes the most of your limited kitchen time.
A Time-Saving Indulgence
Seriously, these dipped pretzels are the definition of efficiency.
You spend maybe fifteen minutes actively dipping, tops.
The rest of the time is just waiting for the magic to harden.
This means you can pop them in the fridge and go fold that laundry.
Or better yet, you can finally sit down and read that book.
It is an indulgence that respects your packed schedule.
We all need those shortcuts that do not sacrifice quality.
Crowd-Pleasing Flavor for Every Occasion
Have you ever met someone who did not like chocolate covered pretzels?
I have not, and that is why they are my go-to party snack.
The flavor profile is universally loved by both kids and grown-ups.
They are salty, sweet, crispy, and creamy—pure perfection!
From holiday platters to school bake sales, they fit right in.
These **White Chocolate Pretzels** elevate any simple gathering.
They are a simple dish that always gets big compliments.
Ingredients for White Chocolate Pretzels
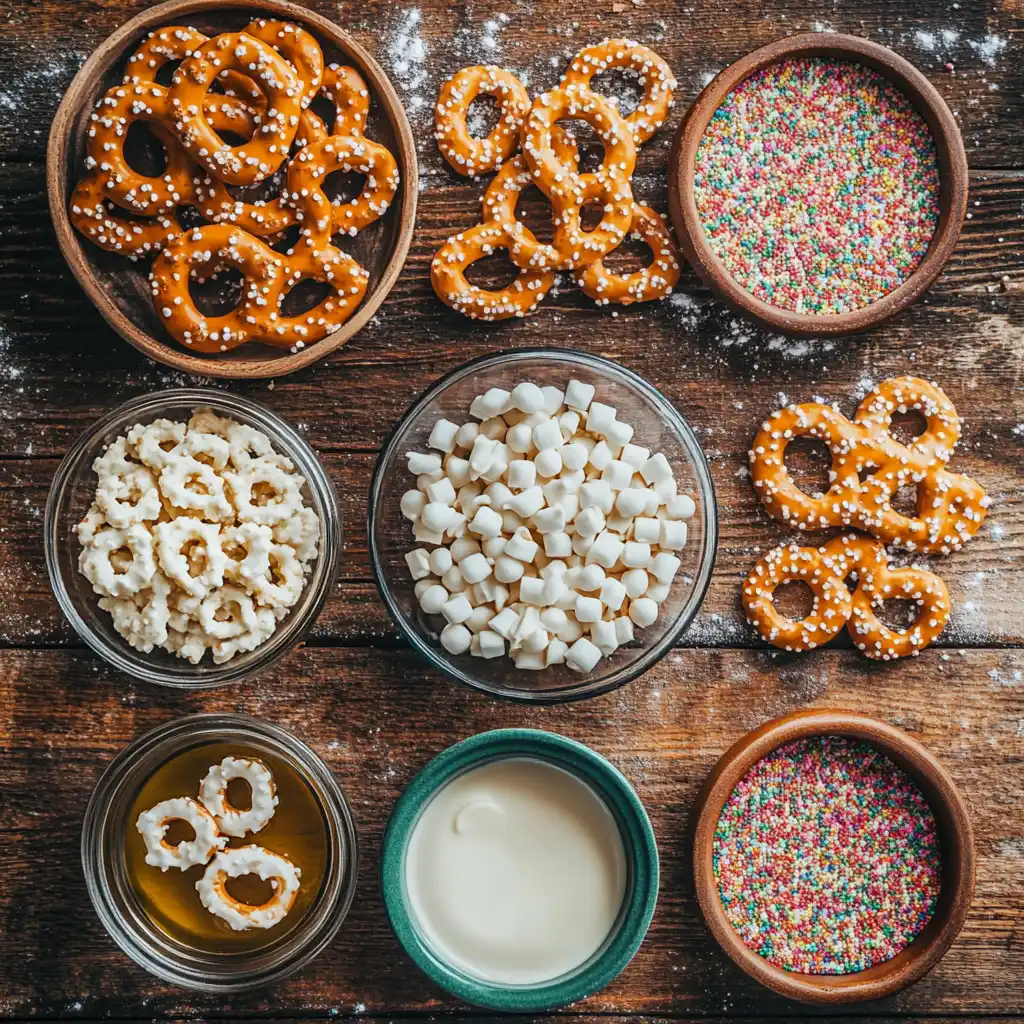
Making these glorious treats requires just a handful of ingredients.
The beauty lies in their simplicity, allowing the flavors to truly shine.
You can find the exact quantities for this recipe down at the bottom of the article.
That printable recipe card is perfect for keeping your counter clean.
Here is what we need to gather for our dipping adventure.
Choosing the Right Pretzels
You will need about a one-pound bag of your favorite pretzels.
I usually grab the classic pretzel twists since they hold the chocolate nicely.
However, pretzel rods are fantastic if you want a more elegant, long stick.
The little pretzel snaps are cute for tiny bite-sized snacks.
Just make sure they are fresh and wonderfully crunchy.
Deciphering High-Quality White Chocolate
Okay, this step is crucial, so listen up, friend.
The quality of your melted white chocolate makes all the difference.
I strongly recommend using high-quality melting wafers or bars.
Avoid those cheap baking chips if you can, as they often seize or taste waxy.
Good white chocolate melts smoothly, like melted silk, which is what we want.
Look for brands that specify “cocoa butter” in the ingredients list.
Essential Tools and Helpers (Oil/Shortening)
Sometimes, white chocolate can be a little moody and melt too thick.
This is where a little bit of vegetable oil or shortening comes in handy.
Adding just a tiny bit helps thin the chocolate for easy dipping.
This ensures you get that perfect, even coating on your **White Chocolate Pretzels**.
It helps the melted chocolate reach that beautiful, flowing consistency.
Fun Toppings and Decorations (Optional)
This is the part where you get to unleash your inner artist!
Sprinkles are always a delightful choice, especially for the holidays.
I love using colorful sanding sugar for a beautiful shimmer.
You might also want to drizzle on some melted milk or dark chocolate later.
Crushed nuts or even some crushed peppermint candies work well, too.
Keep these decorations ready before you start dipping the pretzels.
How to Make White Chocolate Pretzels
I promise you, making these is truly as easy as pie, maybe even easier.
We are just following a few simple steps to achieve crunchy, sweet perfection.
The key is to set yourself up for success before you even start melting the chocolate.
Let us walk through the process together, step by simple step.
Preparing Your Dipping Station
First things first, you need to get organized, my friend.
I always line a large baking sheet with parchment paper.
This prevents the chocolate covered pretzels from sticking to the tray.
Lay out your pretzels in a bowl so they are ready to go immediately.
If you are using sprinkles, put them in a small, shallow dish nearby.
Having everything ready means no frantic scrambling later on.
The Art of Melting the White Chocolate Pretzels
Now, let us tackle the star of the show: that gorgeous white chocolate.
Place your white chocolate wafers into a microwave-safe bowl.
If you are using vegetable oil to thin it, add that in now too.
Microwave the chocolate on high, but only for 30-second bursts.
Stir really well after each interval, even if it does not look melted yet.
This gentle approach stops the delicate white chocolate from seizing.
Keep going until the mixture is beautifully smooth, like liquid velvet.
Dipping and Coating Your Pretzels
This is the fun part where the magic really happens!
Take one pretzel at a time and dunk it completely into the melted chocolate.
I use a fork or a small dipping tool to help me here.
Lift the pretzel out and gently tap the fork against the bowl’s edge.
This allows all the excess melted chocolate to drip off.
We want a lovely, even coating, not a big puddle underneath.
Carefully place your freshly dipped **White Chocolate Pretzels** onto the prepared baking sheet.
Decorating Your White Chocolate Pretzels
Remember, you need to be quick with this step.
The white chocolate sets pretty fast once it hits the cooler air.
If you are using sprinkles, add them right after you place the pretzel down.
A little flick of the wrist usually gets them scattered just right.
This is where those easy dessert ideas really come to life visually.
If you plan to drizzle with dark chocolate, you will do that later.
For now, just focus on adding those fun, festive toppings quickly.
Setting and Storing Your Delicious Treats
Once all your **chocolate covered pretzels** are decorated, they need to set.
You can leave them on the counter at cool room temperature for an hour or two.
If you are in a rush, pop the tray into the refrigerator for fifteen minutes.
They are ready when the white chocolate coating is completely firm and hard.
Once set, store your delicious treats in an airtight container.
They make such a wonderful snack when you need a little pick-me-up.
Tips for Success
I have learned a few little tricks over the years while making countless batches.
These simple tips will help guarantee your **White Chocolate Pretzels** turn out flawlessly.
Kitchen wisdom is always best when it is shared, don’t you think?
Follow these quick bits of advice for the easiest chocolate dipping experience ever.
- Always use a clean, fully dry bowl for melting the chocolate.
- Never overheat the white chocolate; low and slow is the secret to smoothness.
- Make sure your pretzels are totally coated for the best flavor balance.
- If the chocolate thickens while dipping, microwave it for 10 short seconds.
- Work in small batches if your kitchen is very warm.
Preventing Chocolate Seizing
White chocolate can be notoriously temperamental, like a diva sometimes.
If even a tiny drop of water touches the melted chocolate, it will seize.
Seizing means it instantly turns into a grainy, unusable lump, which is frustrating.
To prevent this, use a completely dry bowl and clean utensils, always.
Also, ensure you are stirring frequently during the melting process.
If it does seize, sometimes stirring in a teaspoon of vegetable oil can save it.
Achieving Perfect Coverage
Nobody wants a half-dipped, sad-looking pretzel, right?
For beautiful, full coverage, make sure your melted chocolate is thin enough.
If it seems too thick, just add a tiny bit more vegetable oil or shortening.
Remember to tap the fork gently against the bowl after dipping each pretzel.
This tapping action removes all the excess chocolate beautifully.
It ensures a smooth coating and prevents those messy pools underneath.
These **chocolate covered pretzels** should look professional and stunning.
Equipment Needed
You truly do not need fancy gadgets for this simple recipe.
You probably already have all these kitchen essentials lying around.
I love a recipe that uses minimal cleanup, and this is one of them.
Gather these items before you start melting the white chocolate.
- A sturdy, microwave-safe mixing bowl for melting.
- A rubber spatula or spoon for constant stirring.
- Parchment paper or wax paper to line your baking sheets.
- Baking sheets to hold all your beautiful, dipped creations.
- A fork or specialized dipping tool for easy coating.
Essential Kitchen Tools
The microwave-safe bowl is, of course, absolutely essential.
Parchment paper makes cleanup a total breeze, which I appreciate.
Honestly, a good, sturdy spoon for stirring is your best friend here.
Alternatives for Dipping
If you don’t have a dipping fork, a regular dinner fork works just fine.
I have even used a wooden skewer to lift the pretzels out sometimes.
For large pretzel rods, you might prefer using clean tongs instead.
Use what you have on hand; we are all about practicality here.
Variations
One of the best things about making **White Chocolate Pretzels** is their versatility.
You can easily change the flavors and decorations to fit any season or craving.
Feel free to get creative and make this easy dessert truly your own.
I often adapt this recipe for different holidays throughout the year.
Flavor Twists for White Chocolate Pretzels
- Add a teaspoon of peppermint extract to the melted white chocolate for a cool twist.
- Swirl in some melted peanut butter or caramel for a richer flavor profile.
- Drizzle with melted dark chocolate and sprinkle with sea salt for ultimate contrast.
- Use different colored candy melts instead of white chocolate for vibrant results.
- Mix in some finely crushed espresso powder for a sophisticated mocha flavor.
Dietary Swaps (Gluten-Free and Vegan Options)
Do not let dietary restrictions stop you from enjoying these treats.
It is simple to adapt this recipe for various needs and preferences.
I have made successful batches using these easy substitutions.
- For gluten-free **chocolate covered pretzels**, simply use gluten-free pretzel twists or rods.
- To make them vegan, use high-quality, dairy-free white chocolate melting wafers.
- Ensure your sprinkles or toppings are also certified vegan, if needed.
Seasonal and Holiday Adaptations
This recipe is perfect for customizing for any holiday celebration.
I love making themed **White Chocolate Pretzels** throughout the year.
- **Christmas:** Use red and green sprinkles or crushed peppermint candy canes.
- **Halloween:** Dip them and then drizzle with black or orange candy melts for spooky treats.
- **Valentine’s Day:** Use pink or red candy melts and heart-shaped sprinkles.
- **Fourth of July:** Decorate with red, white, and blue sanding sugars for a festive look.
Serving Suggestions

These beautiful **White Chocolate Pretzels** deserve a lovely presentation.
They are not just a snack; they are a delightful centerpiece!
Thinking about how you serve them can really elevate the entire experience.
Here are a few ways I like to present and pair these easy desserts.
- Arrange them vertically in a tall glass or jar for a stunning display.
- Package small groups in cellophane bags tied with ribbon for quick gifts.
- Serve them alongside a platter of fresh fruit for a lighter contrast.
The Best Ways to Present White Chocolate Pretzels
Presentation is key, especially when you are entertaining guests.
I find that arranging the various shapes and sizes adds visual interest.
Use a pretty serving tray or a tiered stand to show them off.
Scatter a few extra sprinkles on the platter for a final festive touch.
Pairing with Beverages
What goes better with a sweet and salty crunch than a cozy drink?
These **chocolate covered pretzels** pair wonderfully with hot cocoa, of course.
They are also fantastic alongside a strong cup of coffee or espresso.
For an evening treat, try them with a crisp glass of chilled rosé wine.
FAQs about White Chocolate Pretzels
I get so many questions about melting chocolate and storage techniques.
It is perfectly normal to have a few lingering questions about this easy dessert.
Here are the answers to some common concerns about making these perfect treats.
How long do homemade White Chocolate Pretzels last?
If stored correctly in an airtight container, they last quite a while.
I find they stay fresh and crunchy for up to two weeks at room temperature.
Make sure they are kept away from direct sunlight and heat, though.
They are usually devoured long before the two-week mark, honestly!
Can I use chocolate chips instead of melting wafers for White Chocolate Pretzels?
You definitely can use white chocolate chips in a pinch, but I advise against it.
Chocolate chips often contain stabilizers that prevent them from melting smoothly.
This can lead to a thicker, lumpier coating on your **chocolate covered pretzels**.
Melting wafers or high-quality baking bars give you the best, silkiest result.
What is the best way to store chocolate covered pretzels so they don’t stick?
The trick is making sure they are completely set and dry before storing them.
Layer the finished **White Chocolate Pretzels** in your airtight container.
Separate each layer with a sheet of parchment or waxed paper.
This simple barrier stops them from fusing together in the container.
Why did my white chocolate become grainy (seize)?
Chocolate seizing is usually caused by exposure to even a tiny amount of water.
It can also happen if the white chocolate gets too hot too quickly.
Remember to melt slowly in short intervals and keep all tools totally dry.
This careful method ensures your melted white chocolate remains smooth and glossy.
Final Thoughts
See? I told you making beautiful **White Chocolate Pretzels** was incredibly easy.
There is such a deep satisfaction in making something simple yet so delightful.
These treats are a perfect little reminder that joy can be found in small moments.
I hope this recipe becomes a reliable, cherished favorite in your busy kitchen.
Sharing the Joy of White Chocolate Pretzels
I truly believe food tastes better when it is shared with people you love.
These pretzels are perfect for packing up and giving away to neighbors.
They bring a little spark of happiness wherever they go, trust me.
Take a moment to savor the sweet and salty goodness you created.
Your Next Favorite No-Bake Treat
Forget the complicated baking projects that leave you stressed out.
These quick **chocolate covered pretzels** are the only no-bake recipe you need.
They are fun, fast, and always a huge hit with everyone who tries them.
Go ahead, grab those pretzels, and let the dipping adventure begin!
Variations
One of the best things about making **White Chocolate Pretzels** is their versatility.
You can easily change the flavors and decorations to fit any season or craving.
Feel free to get creative and make this easy dessert truly your own.
I often adapt this recipe for different holidays throughout the year.
Flavor Twists for White Chocolate Pretzels
- Add a teaspoon of peppermint extract to the melted white chocolate for a cool twist.
- Swirl in some melted peanut butter or caramel for a richer flavor profile.
- Drizzle with melted dark chocolate and sprinkle with sea salt for ultimate contrast.
- Use different colored candy melts instead of white chocolate for vibrant results.
- Mix in some finely crushed espresso powder for a sophisticated mocha flavor.
Dietary Swaps (Gluten-Free and Vegan Options)
Do not let dietary restrictions stop you from enjoying these treats.
It is simple to adapt this recipe for various needs and preferences.
I have made successful batches using these easy substitutions.
- For gluten-free **chocolate covered pretzels**, simply use gluten-free pretzel twists or rods.
- To make them vegan, use high-quality, dairy-free white chocolate melting wafers.
- Ensure your sprinkles or toppings are also certified vegan, if needed.
Seasonal and Holiday Adaptations
This recipe is perfect for customizing for any holiday celebration.
I love making themed **White Chocolate Pretzels** throughout the year.
- **Christmas:** Use red and green sprinkles or crushed peppermint candy canes.
- **Halloween:** Dip them and then drizzle with black or orange candy melts for spooky treats.
- **Valentine’s Day:** Use pink or red candy melts and heart-shaped sprinkles.
- **Fourth of July:** Decorate with red, white, and blue sanding sugars for a festive look.
Serving Suggestions
These beautiful **White Chocolate Pretzels** deserve a lovely presentation.
They are not just a snack; they are a delightful centerpiece!
Thinking about how you serve them can really elevate the entire experience.
Here are a few ways I like to present and pair these easy desserts.
- Arrange them vertically in a tall glass or jar for a stunning display.
- Package small groups in cellophane bags tied with ribbon for quick gifts.
- Serve them alongside a platter of fresh fruit for a lighter contrast.
The Best Ways to Present White Chocolate Pretzels
Presentation is key, especially when you are entertaining guests.
I find that arranging the various shapes and sizes adds visual interest.
Use a pretty serving tray or a tiered stand to show them off.
Scatter a few extra sprinkles on the platter for a final festive touch.
Pairing with Beverages
What goes better with a sweet and salty crunch than a cozy drink?
These **chocolate covered pretzels** pair wonderfully with hot cocoa, of course.
They are also fantastic alongside a strong cup of coffee or espresso.
For an evening treat, try them with a crisp glass of chilled rosé wine.
FAQs about White Chocolate Pretzels
I get so many questions about melting chocolate and storage techniques.
It is perfectly normal to have a few lingering questions about this easy dessert.
Here are the answers to some common concerns about making these perfect treats.
How long do homemade White Chocolate Pretzels last?
If stored correctly in an airtight container, they last quite a while.
I find they stay fresh and crunchy for up to two weeks at room temperature.
Make sure they are kept away from direct sunlight and heat, though.
They are usually devoured long before the two-week mark, honestly!
Can I use chocolate chips instead of melting wafers for White Chocolate Pretzels?
You definitely can use white chocolate chips in a pinch, but I advise against it.
Chocolate chips often contain stabilizers that prevent them from melting smoothly.
This can lead to a thicker, lumpier coating on your **chocolate covered pretzels**.
Melting wafers or high-quality baking bars give you the best, silkiest result.
What is the best way to store chocolate covered pretzels so they don’t stick?
The trick is making sure they are completely set and dry before storing them.
Layer the finished **White Chocolate Pretzels** in your airtight container.
Separate each layer with a sheet of parchment or waxed paper.
This simple barrier stops them from fusing together in the container.
Why did my white chocolate become grainy (seize)?
Chocolate seizing is usually caused by exposure to even a tiny amount of water.
It can also happen if the white chocolate gets too hot too quickly.
Remember to melt slowly in short intervals and keep all tools totally dry.
This careful method ensures your melted white chocolate remains smooth and glossy.
Final Thoughts
See? I told you making beautiful **White Chocolate Pretzels** was incredibly easy.
There is such a deep satisfaction in making something simple yet so delightful.
These treats are a perfect little reminder that joy can be found in small moments.
I hope this recipe becomes a reliable, cherished favorite in your busy kitchen.
They truly are a fantastic, low-effort, high-reward kitchen activity.
Go ahead and enjoy the sweet success of making these delicious snacks.
Sharing the Joy of White Chocolate Pretzels
I truly believe food tastes better when it is shared with people you love.
These pretzels are perfect for packing up and giving away to neighbors.
They bring a little spark of happiness wherever they go, trust me.
Take a moment to savor the sweet and salty goodness you created.
It is such a wonderful way to connect with others quickly.
Your Next Favorite No-Bake Treat
Forget the complicated baking projects that leave you stressed out.
These quick **chocolate covered pretzels** are the only no-bake recipe you need.
They are fun, fast, and always a huge hit with everyone who tries them.
Go ahead, grab those pretzels, and let the dipping adventure begin!
This easy dessert is a guaranteed winner every single time.
PrintWhite Chocolate Pretzels: Make Yours Today!
- Total Time: 1 hour 35 minutes (includes setting time)
- Yield: Varies (depends on pretzel size, approx. 40-60 pieces)
- Diet: Vegetarian
Description
A simple and delicious recipe for making white chocolate covered pretzels, perfect for a treat or gift.
Ingredients
- 1 pound (450g) Bag of Pretzels (any shape)
- 1 pound (450g) White Chocolate
- 1 tablespoon (15ml) Vegetable Oil (or shortening) (optional, for thinning)
- Sprinkles or other decorations (optional)
Instructions
- Pour the pretzels into a large bowl and set aside.
- Place the white chocolate and vegetable oil (if using) in a microwave-safe bowl.
- Microwave on high for 30-second intervals, stirring well between each interval, until the chocolate is completely melted and smooth. Be careful not to overheat the chocolate, as it can seize.
- If the chocolate is too thick, add a little more vegetable oil or shortening until it reaches a desired dipping consistency.
- Dip each pretzel into the melted white chocolate, ensuring it is fully coated. Allow any excess chocolate to drip off back into the bowl.
- Place the chocolate-coated pretzels onto a parchment paper-lined baking sheet.
- If using sprinkles or decorations, apply them immediately before the chocolate sets.
- Allow the white chocolate to set completely at room temperature (about 1-2 hours) or place them in the refrigerator for quicker setting (about 15-30 minutes).
- Once set, store the White Chocolate Pretzels in an airtight container.
Notes
- The quality of the white chocolate significantly impacts the final taste; use high-quality white chocolate or melting wafers for the best results.
- White chocolate can be tricky to melt; microwave in short intervals and stir frequently to prevent burning or seizing.
- If the chocolate seizes (becomes grainy and hard), you can try to rescue it by stirring in a teaspoon of vegetable oil or shortening at a time until it smooths out, though this is not always successful.
- You can use different types of pretzels (rods, twists, snaps) based on your preference.
- For a variation, you can drizzle melted dark or milk chocolate over the white chocolate once it has set.
- Prep Time: 15 minutes
- Cook Time: 5 minutes (for melting)
- Category: Dessert/Snack
- Method: Dipping/No-bake
- Cuisine: American