Introduction to Kitchen Sink Cookies
Oh, honey, don’t we all sometimes feel like our kitchen sink is overflowing? I certainly do, especially after a busy day juggling work and family, That feeling of beautiful chaos is exactly what makes these Kitchen Sink Cookies so wonderfully perfect, They are truly a metaphor for life, aren’t they?
You just toss in all the amazing, slightly random bits and pieces, and somehow it creates magic, I’m talking about those leftover pretzels, a few toffee bits hiding in the pantry, and, of course, plenty of chocolate chips, This recipe is a lifesaver for busy professionals and moms like us.
It’s quick, forgiving, and delivers a huge flavor payoff with almost zero fuss, These aren’t just cookies; they are an adventure in every bite,Let’s bake a batch of these glorious, everything-but-the-kitchen-sink treats!
PrintKitchen Sink Cookies: Bake the best batch ever?
- Total Time: 40-45 minutes
- Yield: About 24 cookies
- Diet: Vegetarian
Description
A recipe for ‘Kitchen Sink Cookies’, which are loaded with various mix-ins such as chocolate chips, pretzels, and toffee.
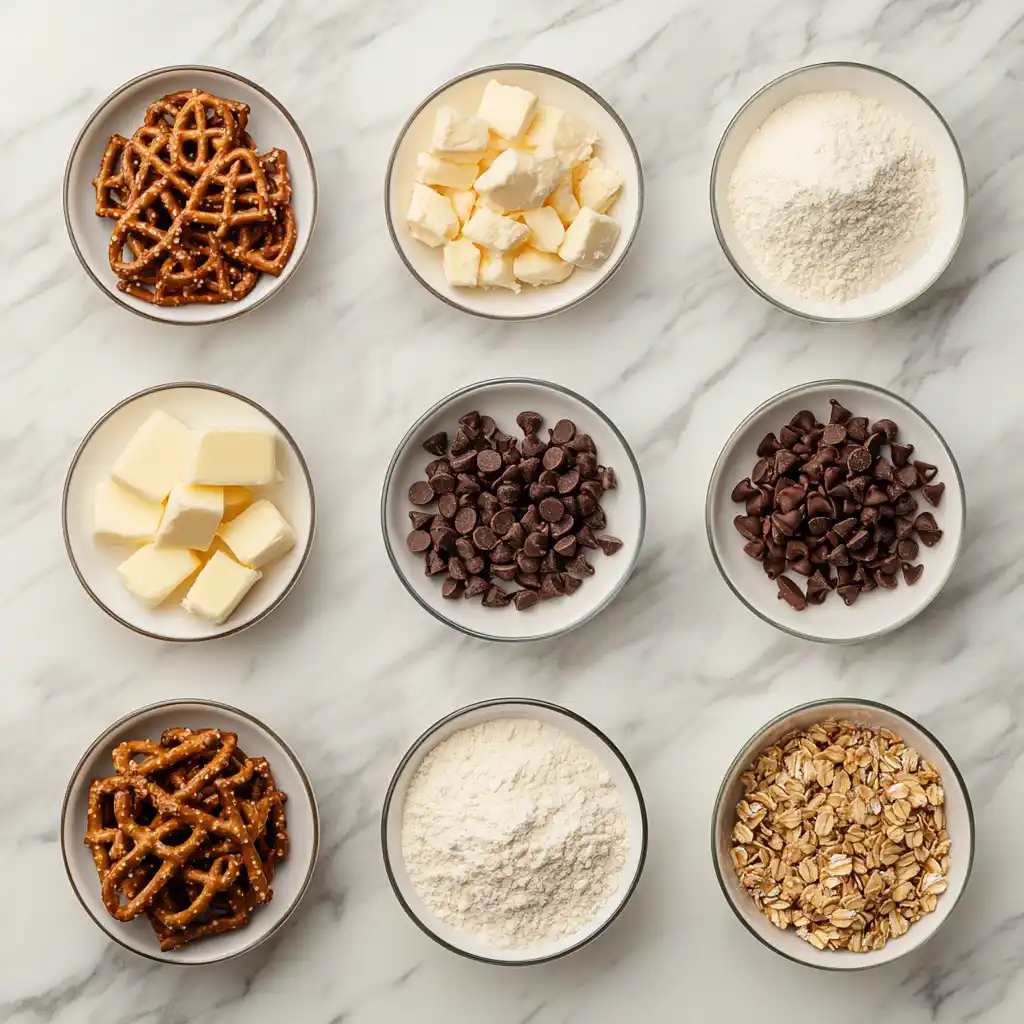
Ingredients
- 1 cup (2 sticks) unsalted butter, softened
- ¾ cup granulated sugar
- ¾ cup packed light brown sugar
- 2 large eggs
- 1 tablespoon vanilla extract
- 2 ¼ cups all-purpose flour
- 1 teaspoon baking soda
- ½ teaspoon salt
- 1 cup chocolate chips (milk, semi-sweet, or a mix)
- 1 cup crushed pretzels
- ¾ cup toffee bits
- ½ cup rolled oats (optional)
- ½ cup chopped nuts (walnuts or pecans, optional)
Instructions
- Preheat your oven to 375°F (190°C). Line two baking sheets with parchment paper.
- In a large bowl, cream together the softened butter, granulated sugar, and brown sugar until light and fluffy.
- Beat in the eggs one at a time, then stir in the vanilla extract.
- In a separate medium bowl, whisk together the flour, baking soda, and salt.
- Gradually add the dry ingredients to the wet ingredients, mixing until just combined. Be careful not to overmix.
- Fold in the chocolate chips, crushed pretzels, toffee bits, and any optional mix-ins (oats, nuts).
- Drop rounded tablespoons of dough onto the prepared baking sheets, spacing them about 2 inches apart.
- Bake for 10-12 minutes, or until the edges are golden brown and the centers are still slightly soft.
- Let the cookies cool on the baking sheets for 5 minutes before transferring them to a wire rack to cool completely.
Notes
- The ‘kitchen sink’ concept means you can customize the mix-ins based on what you have and prefer. Other additions could include potato chips, dried fruit, or different types of candy.
- Ensure the butter is truly softened (room temperature) for the best texture.
- For thicker cookies, chill the dough for 30 minutes before baking.
- Store leftover cookies in an airtight container at room temperature for up to 5 days.
- Prep Time: 20-30 minutes
- Cook Time: 10-12 minutes
- Category: Dessert/Baking
- Method: Baking
- Cuisine: American
Why You’ll Love This Kitchen Sink Cookies
Honestly, these cookies are pure joy wrapped in a salty-sweet hug.
First off, they are incredibly forgiving; no need to be a pastry chef here!
The speed is another huge bonus; we are talking 45 minutes from zero to warm, gooey goodness.
Plus, the taste is out of this world—that perfect balance of salty pretzels and rich chocolate just sings.
It’s the ideal way to use up all those little bits and bobs in your pantry, making you feel clever and resourceful.
They bring that classic homemade comfort without all the fuss.
These **Kitchen Sink Cookies** are truly a win-win for everyone.
Ingredients for Perfect Kitchen Sink Cookies
Baking is truly a delightful dance of chemistry and flavor.
To make the very best **Kitchen Sink Cookies**, we need quality ingredients.
I’m going to walk you through the stars of this recipe right now.
Don’t worry about measuring cups and spoons yet, darling.
The exact amounts are waiting for you at the bottom of this article.
You can easily print those detailed instructions later.
The Foundation: Butter, Sugar, and Eggs
These three are the heart and soul of almost every cookie.
We need unsalted butter, softened to pure room temperature perfection.
It creates that crucial light and fluffy texture when creamed.
We use both granulated sugar and brown sugar for depth of flavor.
Brown sugar adds moisture and that lovely chewiness we adore.
Finally, large eggs bind everything together into a beautiful dough.
Tips for Softening Butter Quickly
Forgot to take the butter out? Don’t panic, it happens to me often!
I usually use a cheese grater to quickly grate cold butter into a bowl.
Alternatively, you can pound it flat with a rolling pin.
Either trick will soften it up fast for your cookie adventure.
The Dry Essentials: Flour, Baking Soda, and Salt
All-purpose flour gives our cookies their necessary structure.
Baking soda is the magic leavening agent that makes them rise.
A little salt balances all the sweetness perfectly.
Don’t skip the salt; it truly makes the flavors pop!
The Flavor Load: Mix-Ins for Kitchen Sink Cookies
This is where the fun starts and your creativity shines!
Remember, the “kitchen sink” means anything goes here.
I love using a combination of salty, sweet, and crunchy textures.
Salty Surprises (Pretzels and beyond)
Crushed pretzels are non-negotiable in my version of **Kitchen Sink Cookies**.
They provide that amazing salty crunch that keeps you coming back for more.
Feel free to toss in some crushed potato chips too.
That unexpected savory element is totally divine.
Sweet Indulgences (Chocolate and Toffee)
We definitely need chocolate chips; I like a mix of milk and semi-sweet.
Toffee bits melt slightly, adding a wonderful buttery caramel flavor.
You could substitute butterscotch chips if you prefer that taste.
Optional Textures (Oats and Nuts)
Rolled oats add a nice chewiness and rustic quality to the cookie.
Chopped nuts, like pecans or walnuts, bring an earthy crunch.
These additions are completely optional, so follow your heart!
How to Make Kitchen Sink Cookies
Okay, let’s roll up our sleeves and get baking!
Making these glorious **Kitchen Sink Cookies** is truly simple.
I promise the process is just as fun as eating them.
Follow these steps for a perfect batch every single time.
Step 1: Preparing Your Workspace for Kitchen Sink Cookies
First things first, preheat your oven to 375°F.
That is 190°C, just in case you were wondering.
I always line my baking sheets with parchment paper.
This prevents sticking and makes cleanup a total breeze.
Step 2: Creaming the Wet Ingredients Perfectly
Grab a large mixing bowl for this crucial step.
Cream the softened butter, granulated sugar, and brown sugar.
You need to mix them until the mixture looks light and fluffy.
This creaming incorporates air, which helps the cookies rise beautifully.
Next, beat in the eggs one at a time until they are fully incorporated.
Then stir in that glorious vanilla extract for flavor.
Step 3: Combining the Dry and Wet Mixes
In a separate, medium bowl, quickly whisk together the dry ingredients.
That means the flour, baking soda, and salt all need a good mix.
Now, gradually add these dry ingredients to the wet mixture.
Mix until they are just combined, and then stop immediately!
Do not overmix the dough, or your cookies will become tough.
We are going for tender, chewy **Kitchen Sink Cookies** after all.
Step 4: Folding in the Flavorful Mix-Ins
This is my favorite part of making these cookies.
Gently fold in the chocolate chips and crushed pretzels.
Toss in the toffee bits and any optional additions like oats or nuts.
Use a spatula and mix only until the mix-ins are evenly distributed.
This ensures you get a surprise in every single bite.
Step 5: Scooping and Spacing the Dough
Drop rounded tablespoons of the cookie dough onto the prepared sheets.
I love using a cookie scoop for perfectly uniform cookies.
Give them plenty of space, about two inches apart, to spread out.
Don’t crowd the pan, or they might bake unevenly.
If you want thicker cookies, now is the time to chill the dough.
Step 6: Baking Your Kitchen Sink Cookies to Golden Perfection
Pop those trays into your preheated oven right now.
Bake them for about 10 to 12 minutes, keep a close eye on them.
The edges should look golden brown when they are ready.
The centers, however, should still look slightly soft.
This ensures they stay wonderfully chewy after they cool down.
Step 7: Cooling and Storing for Optimal Freshness
Let the cookies cool on the baking sheets for about five minutes.
They are still quite fragile when they first come out.
Then, carefully move them to a wire rack to cool completely.
Store any leftover **Kitchen Sink Cookies** in an airtight container.
They stay fresh and delicious for up to five glorious days.
Tips for Success
- Always use room temperature ingredients; cold butter and eggs do not cream well.
- Measure your flour correctly by spooning it into the cup and leveling it off.
- Don’t overmix the dough once the flour is added; mixing develops tough gluten.
- For extra thick cookies, definitely chill the dough for at least 30 minutes.
- Check your oven temperature with an external thermometer for accuracy.
- To prevent sticking, use parchment paper or a silicone baking mat every time.
Essential Equipment for Baking
You don’t need a fancy gadget for amazing cookies, truly.
Just a few essential tools will make this baking journey easy.
Here is what I rely on when whipping up these **Kitchen Sink Cookies**:
- **Baking Sheets:** You need two large sheets, or just one if you bake in batches.
- **Parchment Paper:** This is non-stick magic and makes cleanup effortless.
- **Electric Mixer:** I use a hand mixer or stand mixer for easy creaming.
- **Large Mixing Bowls:** Essential for keeping wet and dry ingredients separate.
- **Rubber Spatula:** Perfect for gently folding in all those wonderful mix-ins.
- **Cookie Scoop:** Not essential, but it guarantees uniformly sized cookies.
- **Wire Cooling Rack:** Crucial for allowing air circulation to stop the baking process.
Variations on Kitchen Sink Cookies
The beauty of the **Kitchen Sink Cookies** recipe is its flexibility.
It’s truly a canvas for your culinary imagination, dear one.
You can easily adapt this recipe to suit different tastes or dietary needs.
Don’t be afraid to experiment and make these cookies uniquely yours.
Gluten-Free and Dairy-Free Adaptations
- For a gluten-free version, simply swap out the all-purpose flour.
- Use a 1:1 gluten-free baking blend that contains xanthan gum.
- Make sure your rolled oats are certified gluten-free if you use them.
- To go dairy-free, substitute the butter with a high-quality vegan butter stick.
- Ensure your chocolate chips are certified dairy-free for the best results.
Seasonal Mix-In Ideas
- In the fall, try adding dried cranberries and a pinch of cinnamon.
- For a festive winter flavor, mix in some crushed candy canes and white chocolate chips.
- During the summer, toasted coconut flakes and dried pineapple are a tropical delight.
- Use mini M&M’s or sprinkles to match any holiday color scheme perfectly.
Making Them Extra Thick (Chilling the dough)
Do you love a thick, substantial cookie with a gooey center?
The secret is chilling the dough, which is a simple step, really.
The cold butter melts slower, which prevents the cookies from spreading too quickly.
- Prepare the dough as instructed in the main recipe, including all mix-ins.
- Wrap the entire ball of dough tightly in plastic wrap before chilling.
- Refrigerate the dough for at least 30 minutes, or up to 24 hours if you have time.
- You can also scoop the dough balls and chill them directly on the baking sheet.
- Bake the chilled cookies an extra 1 to 2 minutes for the best texture.
Serving Suggestions for Kitchen Sink Cookies

These glorious, loaded cookies are fantastic all by themselves, naturally.
But sometimes, a little something extra takes them over the top.
Here are my favorite ways to serve these delightful **Kitchen Sink Cookies**.
- Serve them warm right out of the oven for maximum gooeyness.
- Crumble a slightly cooled cookie over a bowl of vanilla ice cream.
- They make a wonderful addition to any school lunchbox or afternoon snack.
- Package a few in a cute cellophane bag to give as a heartfelt gift.
Perfect Pairings (Drinks and Desserts)
- A tall glass of ice-cold milk is the classic, unbeatable cookie companion.
- Try pairing them with a hot cup of black coffee or a creamy latte.
- For a richer treat, make ice cream sandwiches using two cookies and your favorite flavor.
- A cup of soothing herbal tea provides a lovely balance to the sweet and salty flavors.
FAQs about Kitchen Sink Cookies
I know you probably have a few burning questions about getting these cookies just right.
Don’t worry, I’ve been there too, and I have gathered some common questions right here.
These tips will help you master the art of the perfect **Kitchen Sink Cookies**.
Can I freeze the dough for Kitchen Sink Cookies?
Absolutely, freezing the dough is a fantastic time-saver for busy people!
I often scoop the dough into balls and flash-freeze them on a baking sheet.
Once frozen solid, transfer the dough balls to a freezer-safe bag or container.
They will keep beautifully for up to three months this way.
When you are ready to bake, just place the frozen balls on a lined sheet.
You might need to add an extra two to three minutes to the baking time.
What is the best way to keep my Kitchen Sink Cookies soft?
The secret weapon for soft cookies is a piece of plain white bread.
Place a slice of bread inside the airtight container with your cooled cookies.
The cookies will absorb moisture from the bread, keeping them wonderfully soft for days!
Just remember to replace the bread every couple of days to maintain freshness.
Why did my Kitchen Sink Cookies spread too much?
Oh, the dreaded cookie spread is usually caused by a few simple things.
The most common culprit is butter that was too soft—or even melted—before creaming.
Another reason is not enough flour, so be sure to measure flour accurately.
For a quick fix, try chilling your cookie dough before you bake it next time.
Can I use different types of chocolate chips?
Yes, please do! That is the spirit of these versatile **Kitchen Sink Cookies**.
I love using a mix, like dark chocolate chunks and white chocolate chips.
Peanut butter chips or even butterscotch chips work wonderfully too.
Feel free to substitute or mix and match whatever you have in your pantry.
A Cookie That Tells Your Story
These **Kitchen Sink Cookies** are more than just a sweet treat, truly.
They are a delightful reflection of your busy, beautiful life, full of amazing surprises.
Every bite is a reminder that even the chaos of mismatched ingredients can create something extraordinary.
When you share them, you are sharing a bit of your own resourcefulness and warmth.
I hope this recipe brings a little extra joy and comfort to your kitchen, dear friend.
Go ahead and embrace the sweet, salty, magnificent mess that is you.
Happy baking, and enjoy every single crumb of these incredible cookies!