Introduction to Christmas Tree Cookies
Hello, fellow home bakers! The holiday season is upon us. It’s a magical time, isn’t it?
But let’s be honest, it can also be wonderfully chaotic. Between shopping, parties, and family visits, finding time for festive treats can feel like a challenge. That’s where these delightful Christmas Tree Cookies come in!
I’ve found these little gems are a lifesaver on busy days.
They’re surprisingly simple to whip up. Plus, they bring such a burst of holiday cheer to any table. Imagine your loved ones’ faces lighting up!
These cookies are a quick solution for a busy day. They’re also a fantastic way to impress guests.
Let’s get baking and spread some festive joy together!
Welcome to Festive Holiday Baking
Why You’ll Love This Christmas Tree Cookies Recipe
Tired of complicated holiday recipes? I get it!
This Christmas Tree Cookies recipe is your secret weapon. It’s super quick. The taste is pure holiday magic.
You’ll create festive fun easily. Your family will adore these treats.
It’s baking made simple and joyful.
Effortless Holiday Cheer
These cookies offer pure, unadulterated holiday cheer. They are so easy to make. You’ll be done in a flash.
The aroma fills your home with warmth. It’s a true taste of the season. Your kitchen will feel so festive.
Ingredients for Delicious Christmas Tree Cookies
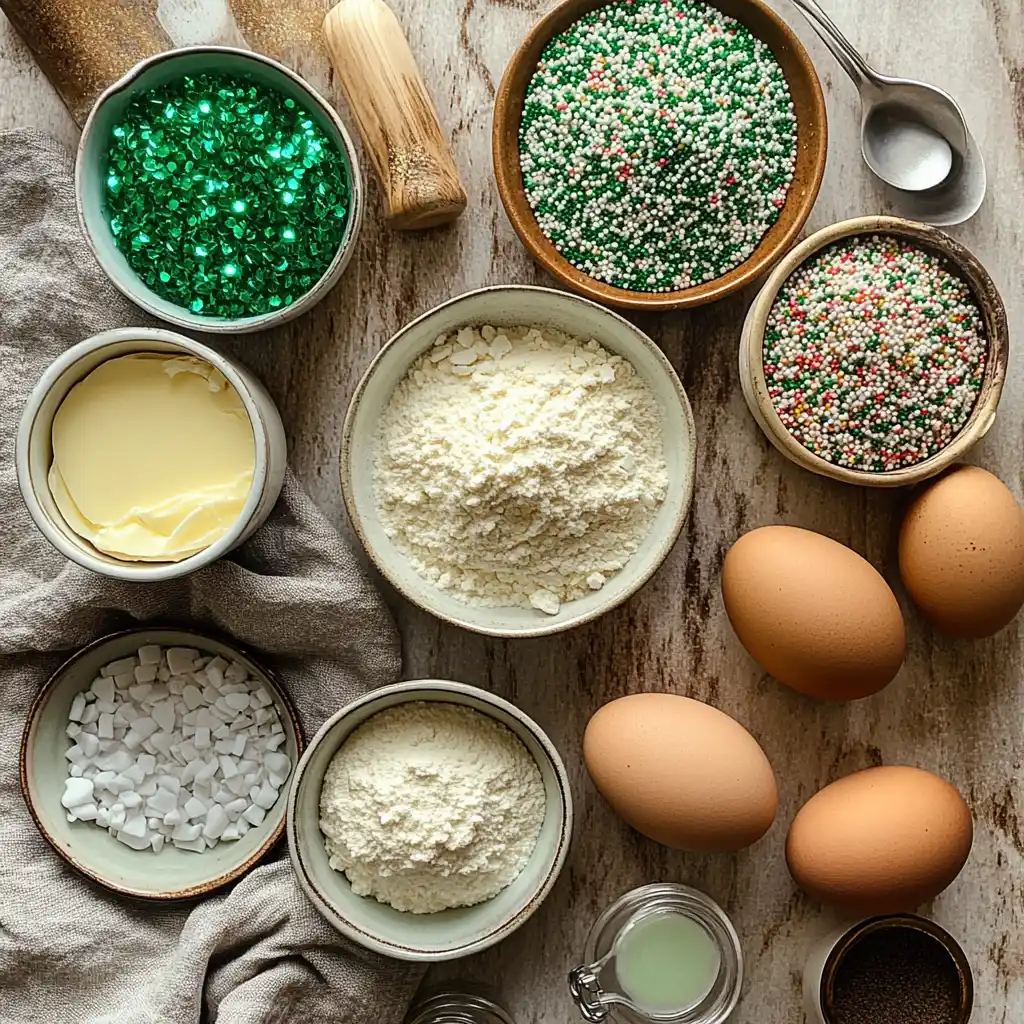
Gathering your ingredients is the first step. It’s like setting the stage for a delightful performance.
We’re keeping things simple here. The full list with exact amounts is at the end. You can print it easily.
Essential Baking Components
We start with butter. It makes cookies rich and tender. Make sure it’s softened just right.
Next, sugar. It adds sweetness and crispness to our treats. Granulated sugar is perfect.
Eggs bind everything together. They also add moisture. Use large eggs for consistency.
Vanilla extract adds a warm, comforting flavor. It’s a classic for a reason.
Flour is our base. It gives the cookies structure. All-purpose flour works wonderfully.
Baking powder is a leavening agent. It helps the cookies puff up slightly. Use it sparingly.
Salt balances the sweetness. It enhances all the other flavors. Just a pinch will do.
Green food coloring is optional. It turns our cookies into little trees. Add it for extra festivity.
Decorative Delights
Now for the fun part: decorating! This is where creativity shines.
Sprinkles are a must for holiday cookies. They add color and sparkle. Use any shape you love.
Icing is another great option. It can be white, green, or red. It’s like painting on your cookies.
Edible glitter adds that extra bit of magic. It makes your Christmas Tree Cookies truly dazzling.
How to Make Christmas Tree Cookies
Let’s get our hands in some dough!
Making these festive treats is a joy. I’ll guide you through each simple step.
Step 1: Preparing Your Baking Station
First, preheat your oven. Set it to 350°F (175°C).
Line your baking sheets with parchment paper. This stops sticking. It makes cleanup a breeze.
Step 2: Crafting the Cookie Dough Base
Grab a big bowl. Cream the softened butter and sugar.
Whip them until they look light and fluffy. It’s like making a cloud!
Beat in the eggs, one by one. Then, stir in the vanilla extract.
In another bowl, whisk the flour, baking powder, and salt. This is your dry mix.
Slowly add the dry mix to the wet ingredients. Mix just until combined. Don’t overmix!
Step 3: Adding a Touch of Holiday Green (Optional)
Want green trees? Divide your dough now.
Add a few drops of green food coloring. Knead it in gently.
Keep working it until the color is even. Your dough will look so festive.
Step 4: Shaping Your Festive Trees
Lightly flour your counter. Roll out the dough. Aim for about 1/4 inch thick.
Now, grab your Christmas tree cookie cutter. Press it firmly into the dough.
Cut out your beautiful cookie shapes. Repeat until all dough is used.
Place the cut-out cookies on the prepared sheets. Leave about an inch between them.
Step 5: Baking to Golden Perfection
Pop the baking sheets into the oven. Bake for 8 to 10 minutes.
Watch for lightly golden edges. This means they’re ready!
These quick baking sessions are great. They make delicious Christmas Tree Cookies.
Step 6: Cooling and Preparing for Decoration
Let the cookies cool on the sheets. Give them a few minutes there.
Then, carefully move them to a wire rack. Let them cool completely.
This is crucial before decorating. Warm cookies melt icing.
Once cool, your Christmas Tree Cookies await their final flair!
Tips for Success with Christmas Tree Cookies
Want perfect holiday cookies every time?
I’ve learned a few tricks over the years.
Expert Baking Advice
- For crispier cookies, bake them a minute or two longer.
- Make sure your butter is truly softened. It makes a difference.
- Get creative with decorations. Use various colors and sprinkles.
- These Christmas Tree Cookies store well. Keep them airtight for up to 3 days.
Equipment Needed for Christmas Tree Cookies
You don’t need a fancy kitchen for these.
Just a few basic tools will do the trick.
Essential Kitchen Tools
- Mixing bowls are essential.
- A whisk and a mixer help.
- A rolling pin is useful.
- A Christmas tree cookie cutter is key.
- Baking sheets are a must.
- Parchment paper makes cleanup easy.
- A wire rack is needed for cooling.
Delicious Variations for Christmas Tree Cookies
These Christmas Tree Cookies are wonderfully adaptable.
Let’s explore some fun ways to change them up. You can make them unique!
Creative Flavor Twists
- Add a pinch of cinnamon or nutmeg to the dough. It adds a warm spice.
- Swap some flour for almond flour. This gives a lovely nutty flavor.
- Zest an orange or lemon into the dough. It adds a bright citrus note.
- Try a hint of peppermint extract. It’s perfect for the holidays.
Dietary Adaptations
- Use a gluten-free flour blend. Ensure it contains xanthan gum.
- For a vegan option, use vegan butter and a flax egg. This is a great swap.
- Reduce sugar slightly. Sweeten with a sugar substitute if needed.
- Consider dairy-free butter alternatives. They work just as well for texture.
Serving Suggestions for Your Christmas Tree Cookies

How do you make these cookies shine even brighter?
Presentation is key for holiday treats.
Perfect Pairings and Presentation
- Serve them on a festive platter. Use a holiday-themed dish.
- Pair with milk or hot cocoa. These are classic holiday drinks.
- Offer them as part of a cookie exchange. They are always a hit.
- Arrange them on a tiered stand. It looks so elegant and festive.
Got more questions about these festive treats? I’ve got answers!
Let’s tackle some common queries about our Christmas Tree Cookies.
Your Christmas Tree Cookie Questions Answered
Q: Can I make these cookies ahead of time?
Yes, absolutely! Baked and cooled cookies store well. Keep them in an airtight container. They’ll stay fresh for up to 3 days. This is great for busy holiday schedules.
Q: My cookies spread too much. What went wrong?
This often happens if your butter was too soft. Or, maybe the dough was too warm. Try chilling the dough for 30 minutes before cutting. This helps prevent spreading.
Q: Can I use a different shape cutter?
Definitely! While we call them Christmas Tree Cookies, any festive shape works. Stars, snowflakes, or gingerbread people are lovely too. Use what you have!
Q: How can I make the green color more vibrant?
Gel food coloring gives a more intense color. Use it instead of liquid. Add a little at a time. Knead until you get your desired festive shade.
Q: What’s the best way to store undecorated cookie dough?
Wrap the dough well. Refrigerate it for up to 3 days. You can also freeze it. Wrap it tightly in plastic wrap, then foil. Thaw in the fridge before rolling.
Final Thoughts on Christmas Tree Cookies
Baking these Christmas Tree Cookies is more than just making a treat.
It’s about creating memories with loved ones. It’s about filling your home with warmth and laughter.
These cookies are a simple joy. They bring a smile to every face. They truly capture the holiday spirit.
So gather your family and friends. Make some festive magic together.
These delicious cookies are a sweet reminder of what matters most.
Cherish these moments. Enjoy every bite of holiday cheer.
Cherishing Holiday Moments
PrintChristmas Tree Cookies: Easy Recipe for Festive Fun!
- Total Time: 30 minutes (+ cooling and decorating time)
- Yield: Approximately 24 cookies (depending on cutter size)
- Diet: Vegetarian
Description
A simple and fun recipe for creating festive Christmas tree-shaped cookies, perfect for holiday baking with family and friends.
Ingredients
- 1 cup (2 sticks) unsalted butter, softened
- 1 cup granulated sugar
- 2 large eggs
- 1 teaspoon vanilla extract
- 2 1/2 cups all-purpose flour
- 1 teaspoon baking powder
- 1/2 teaspoon salt
- Green food coloring (optional)
- Sprinkles, icing, or edible glitter for decoration
Instructions
- Preheat your oven to 350°F (175°C). Line baking sheets with parchment paper.
- In a large bowl, cream together the softened butter and granulated sugar until light and fluffy.
- Beat in the eggs one at a time, then stir in the vanilla extract.
- In a separate bowl, whisk together the flour, baking powder, and salt.
- Gradually add the dry ingredients to the wet ingredients, mixing until just combined. If using green food coloring, divide the dough and add a few drops to one portion, kneading until evenly colored.
- Roll out the dough on a lightly floured surface to about 1/4 inch thickness.
- Using a Christmas tree-shaped cookie cutter, cut out the cookies.
- Place the cookies on the prepared baking sheets, about 1 inch apart.
- Bake for 8-10 minutes, or until the edges are lightly golden.
- Let the cookies cool on the baking sheets for a few minutes before transferring them to a wire rack to cool completely.
- Once cooled, decorate the cookies with icing, sprinkles, or edible glitter as desired.
Notes
- For crispier cookies, bake for an additional minute or two.
- Ensure the butter is truly softened but not melted for the best cookie texture.
- Get creative with your decorations! Use different colored icings and sprinkles to make your trees unique.
- These cookies can be made ahead of time and stored in an airtight container at room temperature for up to 3 days.
- Prep Time: 20 minutes
- Cook Time: 10 minutes
- Category: Dessert
- Method: Baking
- Cuisine: American