Introduction to Christmas Bark Recipe
Oh, honey, the holiday season hits us like a beautiful, chaotic sleigh ride, doesn’t it?
Between work deadlines and finding that perfect gift, who has hours to spend fussing over complicated desserts?
I certainly don’t, and I bet you’re right there with me.
That is exactly why I adore this stunningly simple Christmas Bark Recipe.
It’s a lifesaver, honestly, delivering maximum holiday impact with minimal effort.
This easy peppermint bark is the quick solution we all need when time is short.
Trust me, this recipe will make your kitchen smell like pure Christmas magic!
The Magic of a Simple Holiday Treat
There is just something deeply nostalgic about chocolate and peppermint together.
It reminds me of childhood Christmases and cozy nights by the fire.
This holiday candy captures all that magic without requiring a culinary degree.
It’s the sweet crunch of crushed candy canes atop smooth, rich chocolate.
Plus, making chocolate bark feels more like a fun craft project than actual baking.
It’s wonderfully therapeutic after a long day of fielding emails, too!
Why the Christmas Bark Recipe is Essential for Busy Professionals
As a busy mom and writer, I live by the mantra: “Quick, delicious, and impressive.”
This Christmas Bark Recipe checks all those boxes beautifully.
You can whip up a huge batch of this festive treat in about an hour, mostly hands-off.
Think about it: dessert for the office party, teacher gifts, and neighbor treats, all done!
It’s the perfect no-bake dessert when your oven is already occupied with the turkey or ham.
Honestly, it’s my secret weapon for surviving the holiday baking rush.
The yield is generous, making it an excellent option for holiday entertaining.
Why You’ll Love This Christmas Bark Recipe
Sisters, let’s be real: time is the most precious commodity during December.
That is why I am obsessed with this particular Christmas Bark Recipe.
It tastes like you spent hours slaving away, but it’s done in minutes.
The layers of rich dark and bright white chocolate are simply stunning.
Furthermore, the fresh, cool burst of peppermint is absolutely addictive.
This recipe is truly a win-win for flavor and convenience!
A Time-Saver for the Holidays
When I say this is fast, I really mean it.
We are talking about minimal active time, mostly just melting and spreading.
The time waiting for it to set is when you can actually wrap gifts or sip cocoa.
This no-bake holiday dessert requires zero oven space, which is fantastic.
It’s the ideal solution for those unexpected holiday potlucks, too.
Impressing Guests with Minimal Effort
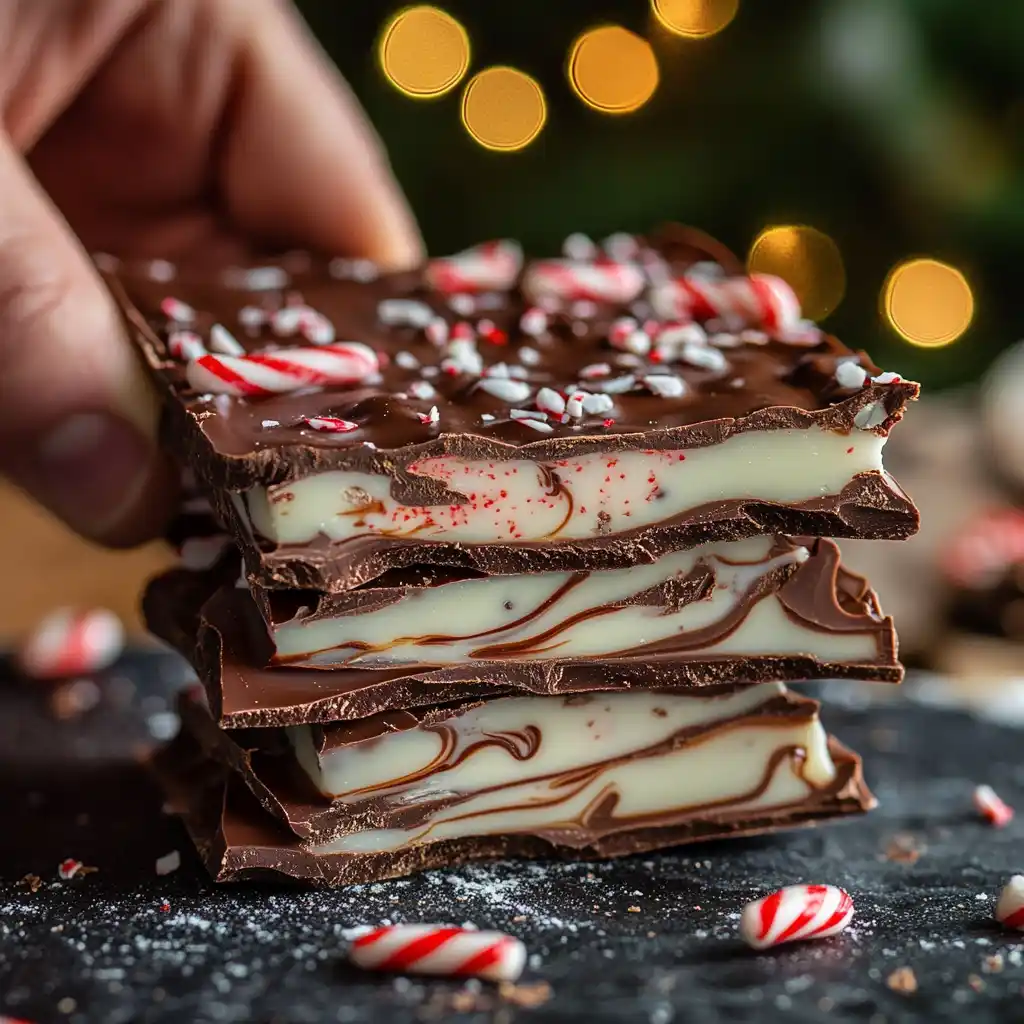
The beautiful, jagged pieces of bark look incredibly gourmet.
You get that gorgeous contrast between the dark and white chocolate layers.
Then, the vibrant red and white candy cane pieces sparkle like jewels.
Who knew such a stunning treat was also one of the easiest Christmas candy recipes?
People will definitely ask for the recipe, I promise you that!
The Irresistible Peppermint-Chocolate Combination
Honestly, the flavor profile here is holiday perfection.
The intense dark chocolate balances the sweet white chocolate beautifully.
A little hint of peppermint extract elevates the whole thing.
Finally, the crunchy texture of the crushed candy canes seals the deal.
It’s a classic combination that everyone, even picky eaters, will adore.
Ingredients for the Perfect Christmas Bark Recipe
Before we dive into the fun part, let’s talk ingredients.
You really only need four main items for this amazing Christmas Bark Recipe.
I always recommend gathering everything before you start melting anything.
This avoids that frantic, mid-melt search for the peppermint extract, ha!
Remember, the exact quantities for this simple recipe are listed below in the printable recipe card.
Decoding the Chocolate Choices (Dark vs. White)
The foundation of any good chocolate bark is, well, the chocolate!
For the best results, I strongly suggest using high-quality melting wafers or good baking bars.
They melt smoother and set up firmer than standard chocolate chips.
We use rich dark chocolate for the base layer, which gives that deep, intense flavor.
Then, a layer of creamy white chocolate goes on top for visual contrast.
If you only have chips, don’t fret, but you might need a tiny bit of shortening to help them flow.
The Essential Peppermint Kick
A little goes a long way with peppermint extract, my friends.
We mix this powerful flavor into the dark chocolate layer.
This infuses the entire peppermint bark with that signature holiday flavor.
Make sure you use *extract* and not oil; oils can sometimes seize the chocolate.
The pure essence of peppermint is what makes this treat so festive and bright.
Choosing Your Candy Cane Crunch
The beautiful, crunchy finish comes from crushed candy canes.
I like to buy a bag of the mini canes because they are easier to crush.
You can also use those round peppermint candies if you prefer.
Just make sure they are crushed finely enough to stick to the chocolate.
The red and white flecks of candy cane truly make this Christmas Bark Recipe sparkle.
Optional Flavor Boosters and Garnishes
While the basic recipe is flawless, sometimes I like to jazz things up a bit.
A touch of vanilla extract in the white chocolate layer adds lovely depth.
You could also drizzle a tiny bit of melted milk chocolate over the top for an artistic touch.
Sprinkling some flaky sea salt adds a gourmet touch that cuts through the sweetness.
A few chopped pecans or walnuts are also a wonderful, crunchy addition.
How to Make Christmas Bark Recipe
Making this bark is truly a joy, not a chore.
It’s a simple process, but following these steps ensures beautiful, clean layers.
We want a crisp break, not a gooey mess, right?
I’ll walk you through exactly how I make my famous Christmas Bark Recipe every year.
You’ll see that this easy holiday dessert comes together so quickly!
Preparing Your Base Layer for the Christmas Bark Recipe
First things first: preparation is key to success here.
Get a standard baking sheet and line it thoroughly with parchment paper.
Wax paper works too, but parchment is stronger and less likely to tear.
This lining is absolutely crucial for easy removal of your finished chocolate bark.
You don’t want your beautiful creation sticking to the pan!
Melting the Dark Chocolate the Right Way
Now, let’s melt that gorgeous dark chocolate.
I usually use the microwave in 30-second intervals, stirring vigorously each time.
Remember, chocolate holds its shape even when it’s melted inside.
Stop heating when just a few small lumps remain, then stir until completely smooth.
You can also use a double boiler method if you prefer a gentler heat.
Just be careful not to get any water near the chocolate, or it will seize up!
Infusing the Peppermint Flavor
Once the dark chocolate is perfectly smooth, stir in the peppermint extract.
Use a rubber spatula to make sure it’s distributed evenly throughout the chocolate mixture.
That fragrant, cool flavor is what makes this a true peppermint bark.
Now, pour this mixture onto your prepared baking sheet.
Use an offset spatula to spread it into a thin, uniform layer.
Don’t worry too much about a perfect rectangle; irregular shapes add charm.
Setting the First Layer (The Patience Game)
We must let the dark chocolate set completely before adding the white layer.
This prevents the colors from swirling together into a muddy mess.
Pop the baking sheet into the refrigerator for about 10 to 15 minutes.
It should feel firm and cool to the touch when it’s ready.
This brief chilling period is essential for a beautiful, distinct layered look.
Creating the Silky White Chocolate Topping
While the base layer chills, melt your white chocolate.
White chocolate is trickier; it burns easily, so go slow with 20-second bursts.
It needs to be silky smooth and pourable, like thick cream.
Once the dark layer is set, pour the melted white chocolate directly over it.
Spread it quickly and evenly to completely cover the dark layer.
Work fast because the cold dark chocolate will start setting the white chocolate immediately.
Decorating and Adding the Final Crunch
This is my favorite part, where the magic happens!
Immediately sprinkle the crushed candy canes all over the wet white chocolate.
Gently press the candy cane pieces into the chocolate so they stick firmly.
We want that gorgeous red and white sparkle on every piece of Christmas candy.
Return the sheet to the refrigerator for at least 30 more minutes to set fully.
The entire slab must be rock-hard before we move to the next step.
Breaking the Christmas Bark Recipe into Beautiful Pieces
Once the bark is completely chilled and firm, it’s time to break it up.
Carefully lift the parchment paper and the chocolate slab off the pan.
I find it easiest to just break it using my hands, which creates lovely jagged edges.
You can also use a large, sharp knife to cut it into more uniform squares.
These irregular pieces are part of the charm of this Christmas Bark Recipe.
Store your finished bark in an airtight container until you are ready to share it.
Tips for Success
Making chocolate bark is simple, but a few pro tips can take it from good to spectacular.
I’ve learned these little tricks over years of holiday baking mishaps, so listen up!
These pointers ensure your Christmas Bark Recipe turns out perfectly crisp and glossy every single time.
Avoiding Common Bark Mistakes
- Always use dry utensils when melting chocolate; even a drop of water can cause seizing.
- Don’t overheat the chocolate; remove it from the heat source when it’s mostly melted, then stir.
- Wait until the dark chocolate is completely set before adding the white layer to prevent muddy colors.
- Make sure your crushed candy canes are fine enough to adhere to the white chocolate.
- Press the toppings gently but firmly into the wet chocolate right away.
Achieving the Perfect Thickness
- Aim for a thickness of about 1/4 inch for the entire slab.
- Spreading the layers too thick makes the bark hard to break and overly rich.
- Use an offset spatula to spread the chocolate quickly and evenly across the parchment paper.
- A thinner layer ensures a satisfying, easy crunch when you break the finished chocolate bark.
Equipment Needed
You don’t need fancy equipment for this easy candy recipe; that’s the beauty of it!
Most of these items are probably already hiding in your kitchen cabinets.
Essential Tools for Making Christmas Bark
- A standard baking sheet is necessary for chilling the bark.
- Parchment paper or wax paper makes cleanup and removal a breeze.
- Microwave-safe bowls or a double boiler for melting the chocolate.
- An offset spatula is key for spreading the chocolate smoothly.
- A small food processor or a Ziploc bag and rolling pin for crushing the candy canes.
Variations
The beauty of a bark recipe is its incredible versatility.
Feel free to experiment and make this Christmas Bark Recipe truly your own!
Dietary Swaps for Your Christmas Bark Recipe
- Use dairy-free chocolate wafers and vegan candy canes for a plant-based option.
- Look for sugar-free chocolate alternatives if you are monitoring sugar intake.
- Substitute the peppermint extract with vanilla or almond extract for a different flavor profile.
Gourmet Flavor Combinations
- Try a blend of milk and dark chocolate instead of white and dark chocolate.
- Add a layer of caramel drizzle between the chocolate layers for richness.
- Swap the peppermint extract for a little orange zest and cinnamon for a spiced bark.
Nutty and Salty Additions
- Sprinkle toasted, chopped pecans or almonds over the top along with the candy canes.
- A generous pinch of flaky sea salt on the dark chocolate layer enhances the sweetness.
- Consider adding mini pretzels for a salty, crunchy twist on your holiday dessert.
Serving Suggestions
This festive bark is perfect for snacking, gifting, and entertaining.
Making your presentation shine is just as important as the taste, I think!
Creative Ways to Present Your Christmas Bark
- Package pieces in small cellophane bags tied with festive ribbon for easy neighbor gifts.
- Arrange the bark on a tiered serving tray as part of a larger dessert spread.
- Use the bark pieces as edible garnishes for ice cream or holiday cocktails.
Perfect Pairings with Coffee and Cocktails
- Serve your peppermint bark alongside a piping hot mug of homemade hot cocoa or coffee.
- It pairs beautifully with an Irish Coffee or a creamy Coquito.
- A glass of chilled port wine or a dry Champagne is also a sophisticated pairing.
FAQs about Christmas Bark Recipe
I know you probably have a few questions swirling around in your head.
I get asked these same things every year when I share my Christmas Bark Recipe!
Here are the answers to the most common questions about making this delightful peppermint bark.
How Long Does Homemade Christmas Bark Last?
That is a great question, especially if you are making this ahead of time.
When stored properly in an airtight container, this chocolate bark lasts quite a while.
It will keep beautifully at cool room temperature for up to two weeks, which is super convenient.
Just make sure it is kept away from heat sources so it doesn’t melt!
Can I Use Chocolate Chips Instead of Melting Wafers?
Yes, absolutely, you can use chocolate chips, but with a slight caveat.
Chocolate chips contain stabilizers that help them keep their shape when baked.
Therefore, they often result in a thicker, less smooth melted consistency.
I recommend adding about a teaspoon of vegetable shortening or coconut oil per cup of chips.
This will help achieve that smooth, glossy finish needed for perfect Christmas candy.
What is the Best Way to Crush Candy Canes?
I have two favorite methods for crushing candy canes, depending on my mood.
The fastest way is using a food processor for a quick, fine crush.
Alternatively, place the candy canes in a heavy-duty Ziploc bag, squeezing out the air.
Then, smash them with a rolling pin or the flat side of a meat tenderizer.
Make sure the pieces are not too large; we want a nice, crunchy sprinkle.
Can this Christmas Bark Recipe be Made Ahead of Time?
Yes, making this bark ahead is one of its biggest selling points!
Since it keeps for up to two weeks, you can easily prepare it in early December.
This frees up your time closer to Christmas for other important tasks.
Just store the finished bark in a cool, dry pantry until you are ready to serve or gift it.
Final Thoughts
Honestly, this Christmas Bark Recipe is more than just a dessert.
It’s a tradition now, a simple, delicious way to spread holiday cheer.
I love seeing the look on people’s faces when they taste that perfect blend of dark, white, and peppermint.
Bringing Holiday Cheer to Your Kitchen
The aroma alone—that mix of rich chocolate and cool mint—is pure holiday magic.
It truly makes my kitchen feel festive, even on the most hectic days.
Making this bark is a wonderful activity to do with children or grandchildren, too.
It’s a simple, joyful way to pause and enjoy the season’s sweetness.
Sharing the Joy of the Christmas Bark Recipe
Remember, the best gifts are often the ones made with love, not bought at the mall.
This homemade Christmas candy is the perfect example of that heartfelt effort.
Wrap up those beautiful, jagged pieces and share the holiday spirit with everyone you know.
Go ahead, grab your chocolate, and start making your amazing Christmas Bark Recipe today!
PrintChristmas Bark Recipe: Make Yours Amazing Now!
- Total Time: 1 hour (including chilling)
- Yield: 1 pound (approximately 20 servings)
- Diet: Vegetarian
Description
A festive and easy-to-make chocolate bark recipe perfect for the Christmas holidays, featuring white and dark chocolate, peppermint extract, and crushed candy canes.
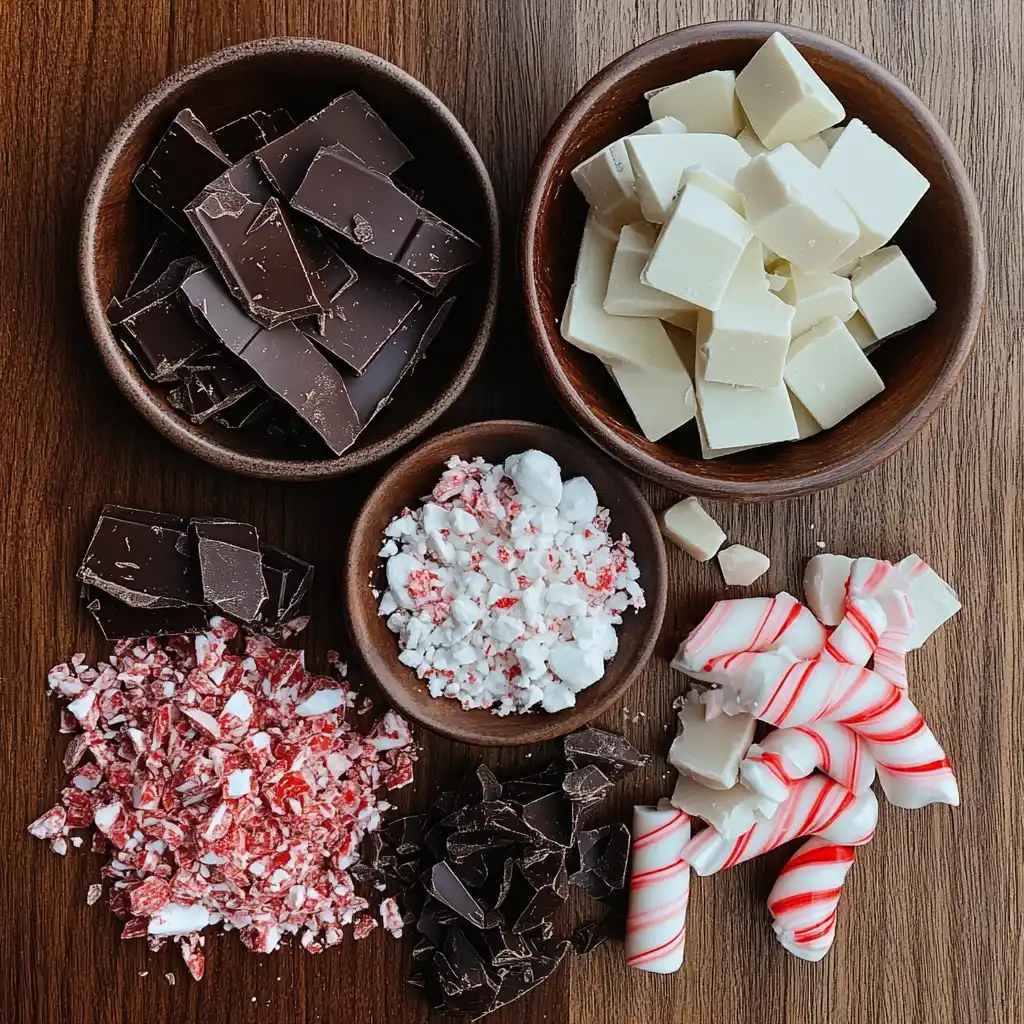
Ingredients
- 12 ounces dark chocolate melting wafers or chips
- 8 ounces white chocolate melting wafers or chips
- 1 teaspoon peppermint extract
- 1 cup crushed candy canes
Instructions
- Line a baking sheet with parchment paper or wax paper.
- Melt the dark chocolate according to package directions. Stir in the peppermint extract.
- Spread the melted dark chocolate evenly onto the prepared baking sheet in a thin layer.
- Place the baking sheet in the refrigerator for 10-15 minutes, or until the chocolate is set.
- While the dark chocolate is setting, melt the white chocolate according to package directions.
- Once the dark chocolate is set, pour the melted white chocolate over the top and spread it evenly.
- Immediately sprinkle the crushed candy canes over the white chocolate layer.
- Return the baking sheet to the refrigerator for at least 30 minutes, or until both layers are completely set.
- Break the bark into irregular pieces.
- Store in an airtight container at room temperature for up to 2 weeks.
Notes
- Use high-quality melting wafers for the best texture and ease of melting.
- If you don’t have melting wafers, you can use chocolate chips, but they may require adding a teaspoon of vegetable oil or shortening per cup to ensure a smooth, spreadable consistency.
- Ensure the dark chocolate layer is fully set before adding the white chocolate to prevent the colors from mixing too much.
- For extra flavor, you can add 1/2 teaspoon of vanilla extract to the white chocolate layer.
- The bark can also be made using only one type of chocolate (either dark or white).
- Prep Time: 20 minutes
- Cook Time: 5 minutes (melting)
- Category: Dessert/Candy
- Method: No-Bake
- Cuisine: American