Introduction to Christmas Sugar Cookie Bars
Oh, the holidays! They’re magical, aren’t they? But let’s be real, they can also be a whirlwind. You’re juggling parties, gifts, and all the usual hustle. That’s where these Christmas Sugar Cookie Bars come in. I whipped up this recipe because I needed a sweet treat that wouldn’t take all day. It’s a quick solution for a busy day. Plus, they’re so pretty, they’ll absolutely impress your loved ones.
Seriously, who has time for individual cookies when you can have this easy bar version? It delivers all that classic sugar cookie flavor. You get that delightful chewiness and sweetness. It’s perfect for your holiday dessert table. You can even get the kids involved in decorating!
The Magic of Holiday Baking Made Easy
This recipe is designed for you. It’s for those moments when you crave homemade goodness. You want a festive dessert without the fuss. These bars are the answer to your holiday baking prayers. They bring cheer without the stress. Baking should be joyful, not a chore. These Christmas Sugar Cookie Bars make it just that.
Why You’ll Love This Christmas Sugar Cookie Bars
These Christmas Sugar Cookie Bars are pure holiday magic. They’re incredibly easy to whip up. You’ll love how quickly they come together. They taste like classic sugar cookies. But they’re so much simpler to make. These bars are perfect for busy bakers. They offer maximum festivity with minimal effort. You’ll be a holiday hero!
Ingredients for Christmas Sugar Cookie Bars

Gathering your ingredients is the first step. It’s like laying out your tools before a masterpiece. Don’t worry about exact amounts here. You’ll find the full printable recipe at the bottom. I’ll explain why each ingredient is key.
This is where the magic starts. Simple ingredients create a delicious treat. You likely have most of these already. Let’s dive into what makes these Christmas Sugar Cookie Bars so special.
The Foundation: Butter and Sugar
We start with unsalted butter. It gives us control over the saltiness. Softened butter is crucial here. It creams beautifully with sugar. Granulated sugar adds sweetness. It also helps create that lovely texture. Together, they form the base of our cookie.
Binding and Flavor: Eggs and Vanilla
Next, we add large eggs. They bind everything together. They also add richness and structure. Pure vanilla extract is a must. It enhances all the other flavors. It gives our bars that classic, comforting taste. Always use the good stuff if you can!
The Dry Essentials: Flour, Leavening, and Salt
All-purpose flour provides the main structure. It’s the backbone of our cookie bars. Baking powder gives them a little lift. It ensures they aren’t too dense. A pinch of salt balances the sweetness. It really makes the flavors pop. These dry ingredients are simple but vital.
Festive Flair: Decorations and Add-ins
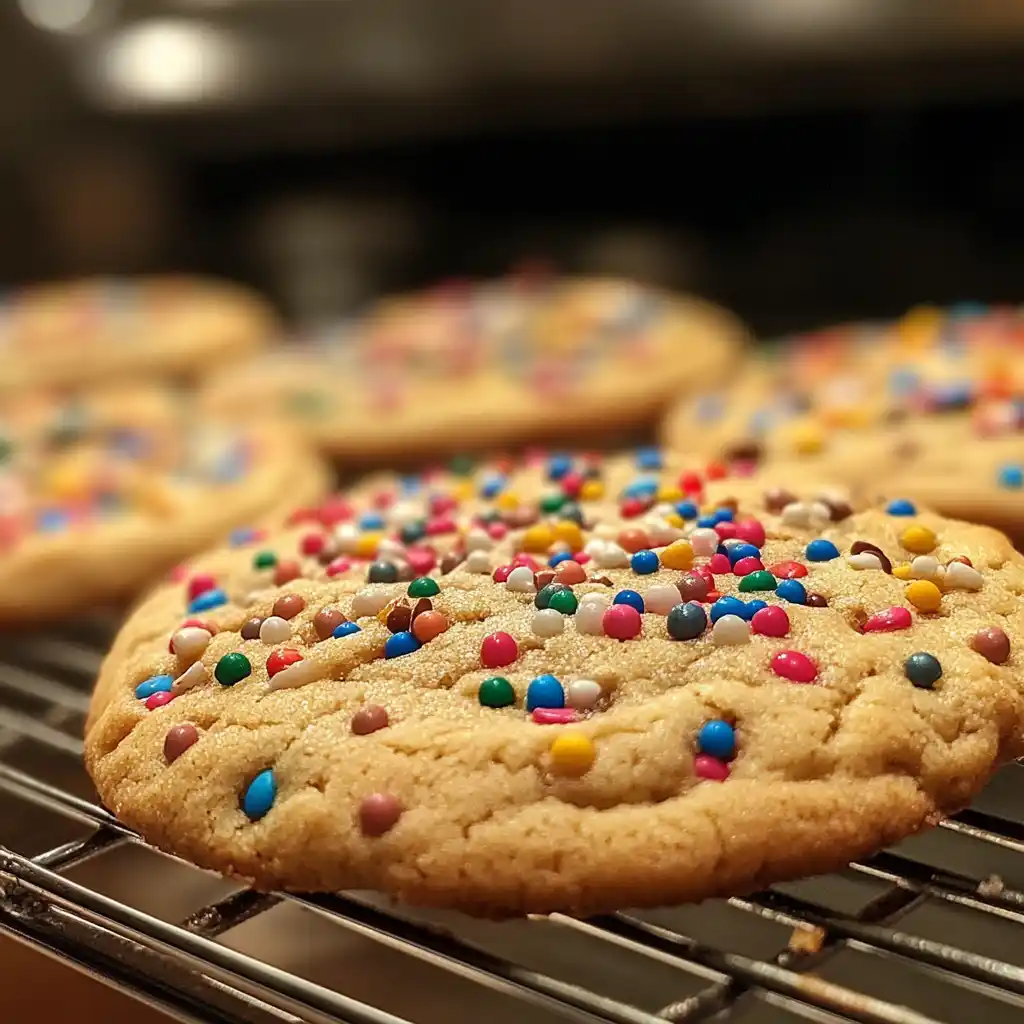
Now for the fun part! Sprinkles are essential for holiday cheer. They add color and sparkle. You can use your favorite holiday shapes. Icing is perfect for adding a sweet finish. You can also use food coloring. Get creative and make them your own!
How to Make Christmas Sugar Cookie Bars
Now for the exciting part! Let’s bake these festive treats together. This process is straightforward. You’ll have delicious bars in no time. Follow these simple steps.
Making these Christmas Sugar Cookie Bars is a joy. It’s a rewarding experience. You’ll create something special. Let’s get started on this baking adventure.
Step 1: Preparing Your Baking Space
First, preheat your oven. Set it to 350°F (175°C). Grab a 9×13 inch baking pan. Grease it well. Then, lightly flour it. This prevents sticking. A prepared pan is key. It ensures easy removal later.
Step 2: Creaming the Wet Ingredients
In a large bowl, combine butter and sugar. Use softened, not melted, butter. Cream them together until fluffy. This step incorporates air. It makes the bars tender. A mixer works best here. Beat until light and pale.
Step 3: Incorporating the Eggs and Vanilla
Add the large eggs one at a time. Beat well after each addition. This ensures they mix in smoothly. Then, stir in the vanilla extract. This adds wonderful flavor. It’s a simple step. It boosts the overall taste.
Step 4: Whisking the Dry Ingredients
In a separate bowl, whisk your dry items. Combine the all-purpose flour and baking powder. Add the salt too. Whisking distributes them evenly. This prevents pockets of leavening. It creates a uniform texture. Proper mixing is important.
Step 5: Combining Wet and Dry Mixtures
Gradually add the dry ingredients to the wet ones. Mix until just combined. Be careful not to overmix. Overmixing develops gluten. This can make bars tough. Stop when you see no flour streaks. Gentle is the word here.
Step 6: Pressing the Dough into the Pan
Now, spread the dough into your prepared pan. Use your hands or a spatula. Press it down evenly. Make sure it covers the bottom. Aim for a consistent layer. This ensures even baking. It makes for neat slices later.
Step 7: Baking to Perfection
Pop the pan into the preheated oven. Bake for about 20-25 minutes. Watch for lightly golden brown edges. The center should look set. It shouldn’t be jiggly. Baking time can vary slightly. Keep an eye on them.
Step 8: The Crucial Cooling Phase
Once baked, remove the pan. Let the bars cool completely. Place the pan on a wire rack. This is super important. Warm bars will crumble. They’ll also melt frosting. Patience is a virtue here. Cool them fully before decorating.
Step 9: Decorating Your Christmas Sugar Cookie Bars
This is where the real fun begins! Once cool, frost your bars. Use your favorite icing. Add colorful sprinkles. Get creative with designs. Make them sparkle. These Christmas Sugar Cookie Bars are your canvas. Let your imagination run wild!
Step 10: Slicing and Serving
After decorating, it’s time to cut. Use a sharp knife. Cut them into your desired bar size. You should get 24-36 bars. Arrange them on a platter. Admire your handiwork. Then, enjoy these festive delights!
Tips for Success
Here are a few pointers. They help ensure perfect bars every time. Follow these tips for the best results. Your holiday baking will shine.
- Use softened butter. Don’t use melted butter.
- Chill dough for easier handling.
- Bake times vary slightly. Watch your bars closely.
- Cool bars completely before frosting.
- Press dough evenly for uniform baking.
Equipment Needed
You don’t need fancy gadgets. Basic kitchen tools will do. Here’s what you’ll need.
- Mixing bowls (large and medium).
- Whisk and electric mixer (or strong arm!).
- 9×13 inch baking pan.
- Measuring cups and spoons.
- Spatula or offset spatula.
- Wire cooling rack.
- Sharp knife for cutting.
Variations for Your Christmas Sugar Cookie Bars
These Christmas Sugar Cookie Bars are wonderful as is. But why stop there? Let’s explore some fun twists. You can customize them easily. Make them truly your own.
Adding a personal touch makes baking special. These variations are simple. They offer new flavor dimensions. Get ready to experiment!
Flavor Twists
- Add a hint of almond extract. Use it with or instead of vanilla.
- Stir in some citrus zest. Lemon or orange zest works well.
- Swirl in a bit of jam. Raspberry is a festive choice.
- Incorporate chocolate chips. White chocolate looks great.
- Top with a sprinkle of cinnamon sugar. Bake them with this topping.
Dietary Adjustments
- Use a gluten-free flour blend. Ensure it’s a 1:1 substitute.
- Try a vegan butter substitute. Use a plant-based egg replacer.
- Sweeten with a sugar alternative. Adjust sweetness to your taste.
- For a dairy-free option, use plant-based butter. Check your frosting ingredients too.
Serving Suggestions
These festive bars are a delight. They pair wonderfully with holiday drinks. Serve them alongside hot cocoa. Milk is also a classic choice. They look beautiful on any dessert tray. Consider a dusting of powdered sugar. It adds an extra touch of elegance.
- Serve with hot cocoa or milk.
- Present on a festive holiday platter.
- Garnish with a dusting of powdered sugar.
- Arrange alongside other holiday cookies.
- Offer as a sweet ending to a holiday meal.
FAQs about Christmas Sugar Cookie Bars
Got questions about these festive treats? I’ve got answers! These Christmas Sugar Cookie Bars are pretty forgiving. But a little know-how goes a long way. Let’s clear up any confusion.
Here are some common queries I get. I hope they help you bake with confidence. Enjoy every step of the process!
How do I store Christmas Sugar Cookie Bars?
Store them in an airtight container. Keep them at room temperature. They’ll stay fresh for about 3-4 days. If you’ve frosted them, be gentle. Avoid stacking them too high.
Can I make the dough ahead of time?
Absolutely! You can make the dough. Then cover it tightly. Refrigerate it for up to 2 days. Let it soften slightly before pressing. This makes handling much easier.
What’s the best way to cut clean bars?
Use a sharp knife. A long, thin knife works best. Wipe the blade clean between cuts. This prevents sticking and ensures neat edges. For super clean cuts, chill the bars briefly.
Can I use different types of sugar?
Granulated sugar is ideal here. It gives the classic texture. You can try a mix of granulated and brown sugar. This adds a slight caramel note. Just be aware it might change the texture slightly. Stick to granulated for the most authentic result.
Final Thoughts
Baking these Christmas Sugar Cookie Bars is more than just making a dessert. It’s about creating moments. It’s about filling your home with warmth. It’s about sharing love through food. These bars are a simple joy. They bring a smile to faces. They are a sweet reminder of the season.
So, go ahead and bake them. Embrace the fun. Enjoy the delicious results. These bars are perfect for any holiday gathering. Or even just a quiet afternoon treat. They embody the spirit of the season. Happy baking, everyone!
PrintChristmas Sugar Cookie Bars: Bake a Holiday Treat Now!
- Total Time: 40 minutes (plus cooling time)
- Yield: 24-36 bars
- Diet: Vegetarian
Description
Delicious and festive Christmas Sugar Cookie Bars, perfect for holiday baking and easy to decorate.
Ingredients
- 1 cup (2 sticks) unsalted butter, softened
- 1 ½ cups granulated sugar
- 2 large eggs
- 1 teaspoon vanilla extract
- 2 ½ cups all-purpose flour
- 1 teaspoon baking powder
- ½ teaspoon salt
- Optional: Sprinkles, icing, food coloring for decoration
Instructions
- Preheat oven to 350°F (175°C). Grease and flour a 9×13 inch baking pan.
- In a large bowl, cream together the softened butter and granulated sugar until light and fluffy.
- Beat in the eggs one at a time, then stir in the vanilla extract.
- In a separate bowl, whisk together the flour, baking powder, and salt.
- Gradually add the dry ingredients to the wet ingredients, mixing until just combined. Do not overmix.
- Press the dough evenly into the prepared baking pan.
- Bake for 20-25 minutes, or until the edges are lightly golden brown and the center is set.
- Let the bars cool completely in the pan on a wire rack.
- Once cooled, frost and decorate as desired with icing, sprinkles, or food coloring.
- Cut into bars and serve.
Notes
- Ensure butter is softened but not melted for the best cookie texture.
- Chilling the dough for 30 minutes can make it easier to handle, especially if you plan to cut out shapes.
- For a softer bar, bake for a shorter time. For a crispier bar, bake a few minutes longer.
- Allow bars to cool completely before frosting to prevent the frosting from melting.
- Prep Time: 15 minutes
- Cook Time: 25 minutes
- Category: Dessert
- Method: Baking
- Cuisine: American