Introduction to Pumpkin Crisp Recipe
As the leaves start to turn those gorgeous shades of red and gold, my kitchen just feels like it needs to be filled with warm, comforting aromas. And what smells more like fall than pumpkin?
That’s why I’m so excited to share my absolute favorite Pumpkin Crisp Recipe for Fall with you today. It’s seriously a hug in a dish!
This isn’t just any dessert. It’s a quick solution for those busy weeknights. It’s also perfect for impressing guests at your next gathering.
You’ll love how simple it is. Plus, the taste is pure autumn magic.
Table of Contents
Embrace the Flavors of Fall with this Easy Pumpkin Crisp Recipe
This recipe truly captures the essence of the season. Get ready to fall in love with this delightful treat.
Why You’ll Love This Pumpkin Crisp Recipe
Life gets busy, right? This Pumpkin Crisp Recipe for Fall is your new best friend. It’s incredibly easy.
You get that amazing fall flavor without a fuss. It’s comforting. It’s quick to assemble.
This dessert brings warmth. It’s perfect for any occasion. Your family will adore it.
A Hug in a Dish: Quick, Cozy, and Delicious
This crisp offers pure cozy comfort. It’s ready fast. The taste is simply divine.
Ingredients for Your Perfect Pumpkin Crisp Recipe
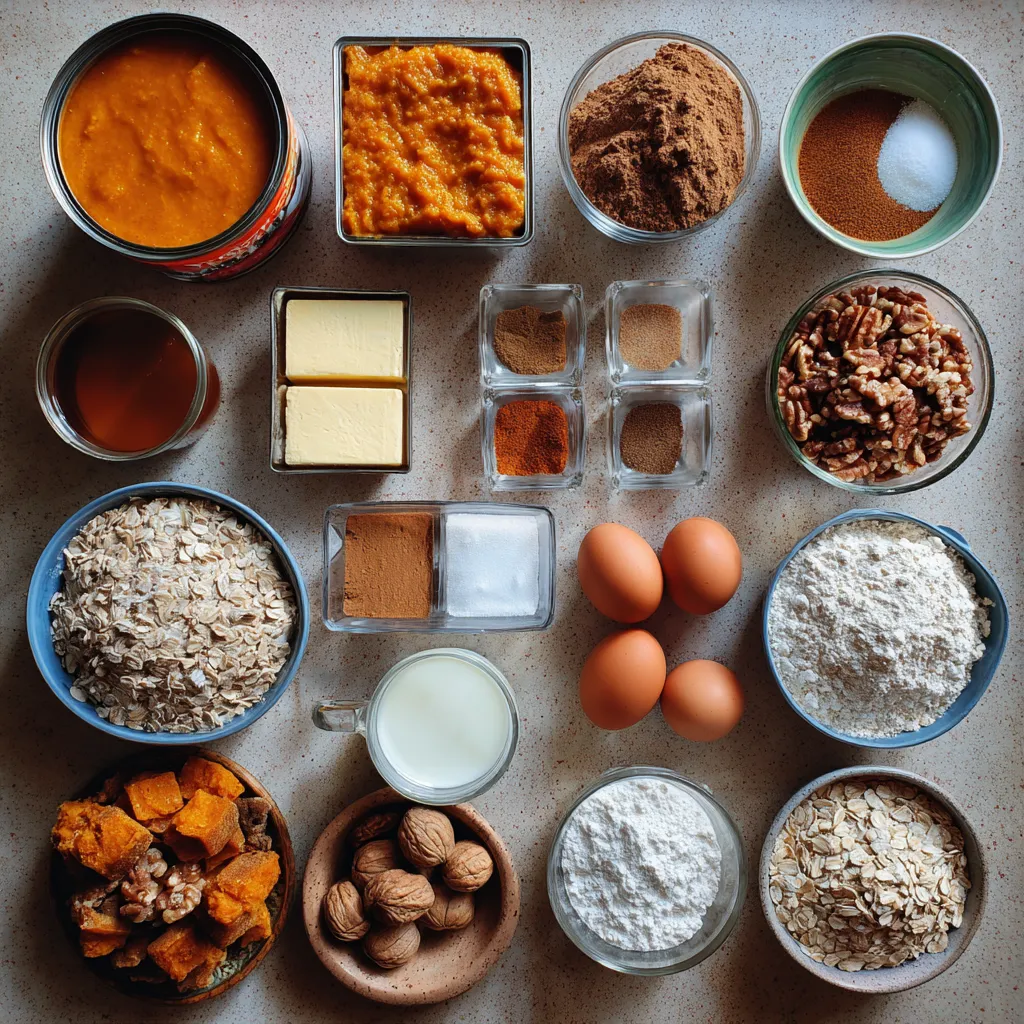
Gathering your ingredients is the first step toward baking bliss. I love seeing all these fall flavors come together.
Don’t worry about exact amounts right now. You can find the full list with measurements at the end of the article.
The Heart of the Crisp: The Pumpkin Filling
Pumpkin Puree: The smooth, earthy base.
This is our star ingredient. It gives the crisp its signature flavor.
Sweeteners: Brown sugar for molasses notes, granulated sugar for classic sweetness.
Brown sugar adds a lovely caramel depth. Granulated sugar provides simple sweetness.
Warming Spices: Pumpkin pie spice, cinnamon, and nutmeg to capture that quintessential fall aroma.
These spices are pure autumn magic. They create that cozy scent.
Binding and Richness: Eggs for structure, evaporated milk for creamy depth.
Eggs hold everything together nicely. Evaporated milk makes the filling wonderfully rich.
A Pinch of Balance: Salt to enhance all flavors.
Just a little salt makes all the other flavors pop. It’s a small step with a big impact.
The Irresistible Topping: Crunchy, Spiced Perfection
The Dry Mix: Flour for structure, rolled oats for delightful chewiness.
Flour gives the topping body. Rolled oats add that essential, satisfying chew.
More Sweetness and Spice: Brown sugar and cinnamon for that classic crisp flavor.
More brown sugar and cinnamon mean more deliciousness. It’s the perfect sweet and spiced coating.
Aromatic Touches: Nutmeg and ginger for an extra layer of warmth.
These spices add a subtle complexity. They really round out the flavor profile.
A Touch of Savory: Salt to balance the sweetness.
Another pinch of salt helps. It keeps the sweetness from being overwhelming.
The Crucial Fat: Cold butter, key for that crumbly, crisp texture.
Cold butter is non-negotiable for crisp! It creates those wonderful, crumbly bits.
Optional Add-ins: Chopped pecans or walnuts for added crunch and flavor.
Nuts are a fantastic addition. They add extra texture and nutty goodness.
How to Make This Delicious Pumpkin Crisp Recipe
Now for the best part: making this amazing Pumpkin Crisp Recipe for Fall!
It’s surprisingly straightforward. You’ll have a warm, comforting dessert ready in no time.
Let’s get baking together!
Step 1: Prepare Your Baking Dish and Preheat the Oven
First things first, get your oven warming up. Set it to 375°F (190°C).
Grab your 9×9 inch baking dish. Lightly grease it. This stops your crisp from sticking.
A little grease goes a long way. It ensures easy serving later.
Step 2: Crafting the Flavorful Pumpkin Filling
In a medium bowl, combine the pumpkin puree. Add the brown sugar and granulated sugar next.
Stir in the pumpkin pie spice. Add the 1/2 teaspoon of cinnamon, nutmeg, and 1/2 teaspoon of salt.
Mix everything until it’s smooth and well combined. This is the heart of our easy fall dessert.
Step 3: Assembling the Pumpkin Mixture
Beat in the eggs, one at a time. Make sure they’re fully incorporated.
Gently stir in the evaporated milk. This adds a lovely creaminess.
Pour this beautiful pumpkin mixture into your greased baking dish. Smooth it out evenly.
Step 4: Creating the Perfect Oat Topping
Now, let’s make that irresistible topping. In a separate bowl, combine the flour.
Add the rolled oats for that wonderful texture. Stir in the 1/2 cup of brown sugar.
Add the 1 teaspoon of cinnamon. Include the 1/2 teaspoon of nutmeg and the ginger.
Finally, add that 1/4 teaspoon of salt. Whisk it all together.
Step 5: Combining the Topping Ingredients
This is where the magic happens for our spiced pumpkin delight. Add the cold butter pieces.
Use a pastry blender, a fork, or even your fingertips. Cut the butter into the dry ingredients.
Continue until the mixture looks like coarse crumbs. This is key for a crunchy topping.
If you like nuts, stir in chopped pecans or walnuts now. They add an extra layer of flavor and crunch.
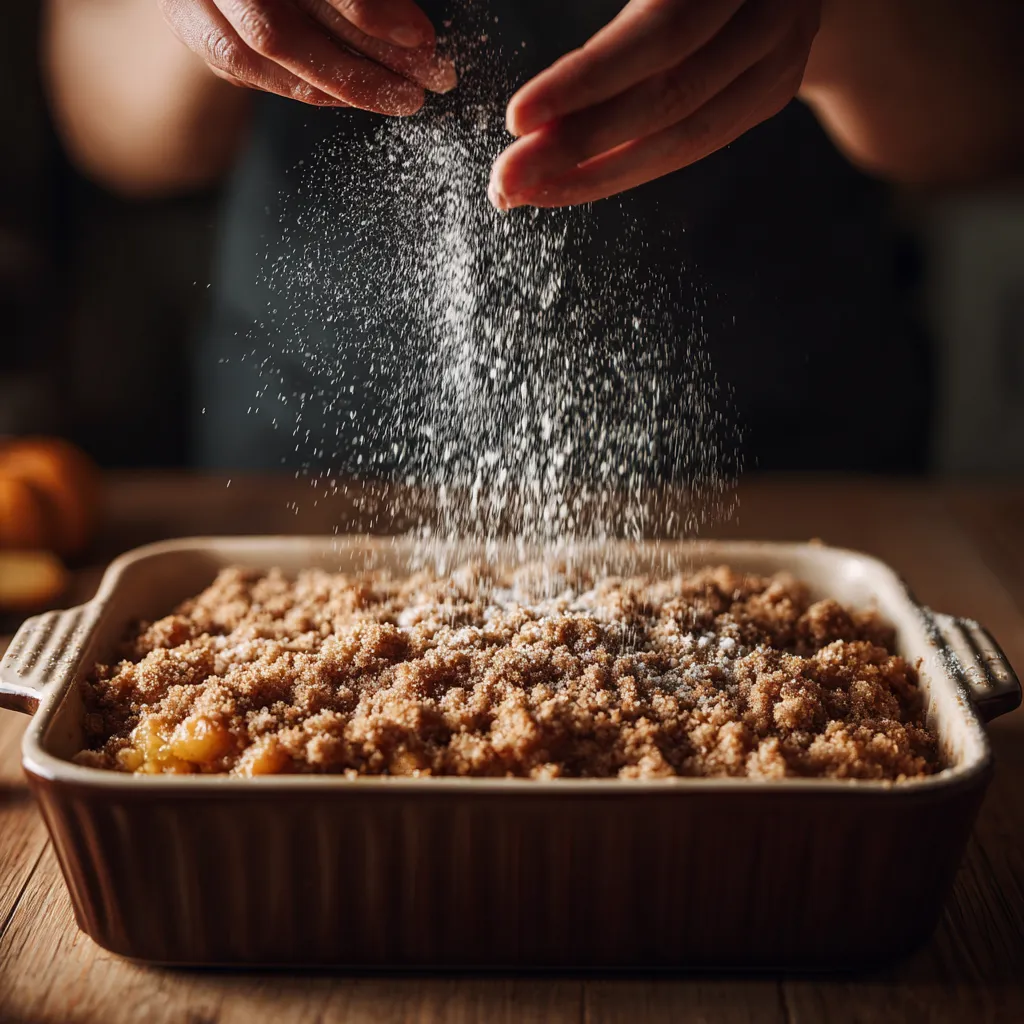
Step 6: Applying the Crunchy Topping
Take your glorious crumb topping. Sprinkle it evenly over the pumpkin filling in the dish.
Make sure it covers the entire pumpkin layer. This creates a beautiful golden crust.
This oat topping is what makes this crisp truly special. It’s so satisfying.
Step 7: Baking to Golden Perfection
Pop the dish into your preheated oven. Bake for about 35 to 45 minutes.
You’re looking for a golden brown topping. The pumpkin filling should be set.
The aroma filling your kitchen will be heavenly. It’s a true sign of a successful fall dessert.
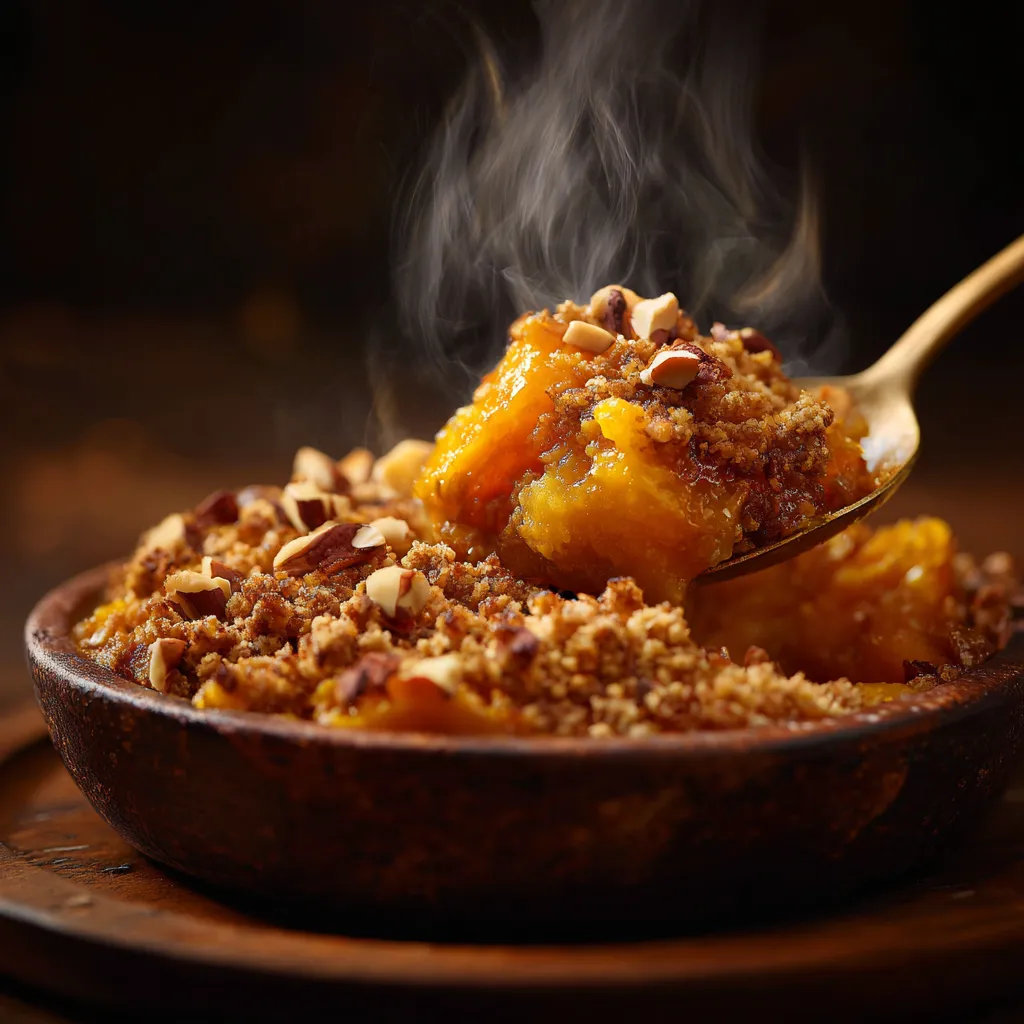
Step 8: Allowing the Pumpkin Crisp to Cool
Once it’s baked, carefully remove the crisp from the oven. Let it cool for a bit.
About 10-15 minutes is usually perfect. This helps the filling set up a little more.
It’s delicious served warm. That’s when the flavors really shine.
Tips for Success with Your Pumpkin Crisp Recipe
Want your Pumpkin Crisp Recipe for Fall to be absolutely perfect?
Here are a few little secrets from my kitchen to yours. They make all the difference.
- Always use cold butter for the crunchiest topping. It’s a game-changer!
- Don’t overmix the topping once the butter is added. Coarse crumbs are best.
- Adjust spices to your personal taste for a truly custom flavor. Make it yours!
- For a richer topping, consider using dark brown sugar. It adds depth.
Equipment Needed for Your Pumpkin Crisp Recipe
To whip up this delightful Pumpkin Crisp Recipe for Fall, you won’t need a professional kitchen.
Just a few common items will do the trick. These tools make the process smooth.
- A 9×9 inch baking dish (or a similar size works too).
- Two medium mixing bowls are essential for combining ingredients.
- A whisk helps blend dry ingredients perfectly.
- Grab a pastry blender, a fork, or even your clean fingertips for the topping.
- Don’t forget your measuring cups and spoons for accuracy.
Variations to Your Pumpkin Crisp Recipe
This Pumpkin Crisp Recipe for Fall is wonderful as is. But, it’s also a fantastic base for creativity!
I love tweaking recipes. It makes them uniquely mine. Here are some ideas for you.
- Nutty Delight: Add a handful of chopped pecans or walnuts to the oat topping. This gives extra crunch. It also adds a lovely nutty flavor.
- Gluten-Free Option: Substitute all-purpose flour with a gluten-free all-purpose flour blend. This makes our easy fall dessert accessible to more people.
- Dairy-Free Twist: Use a dairy-free butter substitute. Also, use a dairy-free milk alternative, like almond or oat milk. Swap it in for evaporated milk.
- Extra Spice: Increase the pumpkin pie spice. You could also add a touch of ground cloves. This creates a bolder flavor profile.
Serving Suggestions for Pumpkin Crisp Recipe
This Pumpkin Crisp Recipe for Fall is pure comfort. It’s even better with a few special touches.
Here are my favorite ways to serve this autumn treat. They make it extra delightful.
- Serve warm with a scoop of vanilla bean ice cream. The contrast is divine.
- A dollop of freshly whipped cream is always a welcome addition. It’s so creamy.
- Drizzle with caramel sauce for an extra touch of indulgence. Pure decadence!
- Pair with a warm mug of apple cider or a spiced latte. Perfect fall sips.
FAQs about Pumpkin Crisp Recipe
Got questions about this delicious Pumpkin Crisp Recipe for Fall? I’ve got answers!
It’s natural to wonder about make-ahead options or storage. Let’s clear things up.
Can I make this pumpkin crisp recipe ahead of time?
Absolutely! You can prepare the entire crisp. Assemble it in the baking dish.
Cover it tightly with plastic wrap. Refrigerate for up to 24 hours.
You might need to add a few extra minutes to the baking time. This ensures it’s heated through nicely.
What is the best way to store leftover pumpkin crisp?
Leftovers are a good thing! Once cooled, cover the dish tightly.
You can also place individual servings in airtight containers. Store them in the refrigerator.
It should stay fresh for about 3-4 days. Reheat gently in the oven or microwave.
Can I substitute fresh pumpkin for canned pumpkin puree in this recipe?
Yes, you can! It’s a wonderful idea for a fresher taste.
Roast a pie pumpkin until tender. Then, puree the flesh.
Make sure to drain any excess moisture. This is crucial for the right filling consistency.
Why is my pumpkin crisp topping not crunchy?
Several things can affect crispiness. Ensure your butter was truly cold.
Don’t overmix the topping. You want coarse crumbs, not a paste.
Also, try not to overbake the filling. A slightly underbaked filling can make the topping soggy.
Final Thoughts on Your Delicious Pumpkin Crisp Recipe
There you have it, my friends! This Pumpkin Crisp Recipe for Fall is more than just a dessert. It’s a feeling.
It’s the cozy evenings spent with loved ones. It’s the comforting aroma filling your home. It’s pure autumn bliss in every single bite.
This easy recipe proves that deliciousness doesn’t need to be complicated. It’s perfect for busy lives like ours.
So go ahead, bake up some happiness. Share this wonderful fall dessert. You deserve it!
PrintPumpkin Crisp Recipe: Your Must-Try Fall Treat!
- Total Time: 55 minutes
- Yield: 8 servings
- Diet: Vegetarian
Description
A delightful and easy-to-make pumpkin crisp recipe, perfect for a cozy fall dessert. Featuring a warm pumpkin filling topped with a crunchy, spiced oat topping.
Ingredients
- 1 (15 ounce) can pumpkin puree
- 1/2 cup packed brown sugar
- 1/4 cup granulated sugar
- 1 teaspoon pumpkin pie spice
- 1/2 teaspoon ground cinnamon
- 1/4 teaspoon ground nutmeg
- 1/2 teaspoon salt
- 2 large eggs
- 1/3 cup evaporated milk
- 1 cup all-purpose flour
- 1 cup rolled oats
- 1/2 cup packed brown sugar
- 1 teaspoon ground cinnamon
- 1/2 teaspoon ground nutmeg
- 1/4 teaspoon ground ginger
- 1/4 teaspoon salt
- 1/2 cup (1 stick) cold unsalted butter, cut into small pieces
- Optional: Chopped pecans or walnuts for topping
Instructions
- Preheat your oven to 375°F (190°C). Lightly grease a 9×9 inch baking dish.
- In a medium bowl, combine pumpkin puree, 1/2 cup brown sugar, granulated sugar, pumpkin pie spice, 1/2 teaspoon cinnamon, nutmeg, and 1/2 teaspoon salt. Mix well.
- Beat in the eggs one at a time until well combined. Stir in the evaporated milk. Pour the pumpkin mixture into the prepared baking dish.
- In a separate medium bowl, combine flour, rolled oats, 1/2 cup brown sugar, 1 teaspoon cinnamon, 1/2 teaspoon nutmeg, ginger, and 1/4 teaspoon salt. Whisk to combine.
- Cut in the cold butter using a pastry blender, fork, or your fingertips until the mixture resembles coarse crumbs. If desired, stir in chopped nuts.
- Sprinkle the oat topping evenly over the pumpkin mixture in the baking dish.
- Bake for 35-45 minutes, or until the topping is golden brown and the pumpkin filling is set.
- Let the crisp cool slightly before serving. It’s delicious served warm, perhaps with a scoop of vanilla ice cream or a dollop of whipped cream.
Notes
- Ensure your butter is cold for the crispiest topping.
- Adjust the amount of spices to your preference.
- The crisp can be made ahead of time and reheated before serving.
- For a richer flavor, use dark brown sugar in the topping.
- Prep Time: 15 minutes
- Cook Time: 40 minutes
- Category: Dessert
- Method: Baking
- Cuisine: American